> ## Documentation Index
> Fetch the complete documentation index at: https://tools.lunchpaillabs.com/llms.txt
> Use this file to discover all available pages before exploring further.
# Build a real-time presence tracker with avatars
One of the first features you’ll likely want to use after setting up Liveblocks in your app is the [presence element](/bubble/liveblocks/plugin-reference/elements/liveblocks-presence). Presence lets you track who’s on a page and can be used to create features like:
* **Activity indicators**: Show which users are currently active or idle.
* **Online statuses**: Display whether users are online, offline, or away.
* **Collaborative editing indicators**: Highlight when multiple users are viewing or editing the same document or page.
If you prefer a video walkthrough, check out our step-by-step tutorial below. Otherwise, keep reading for the written guide:
## What we'll build
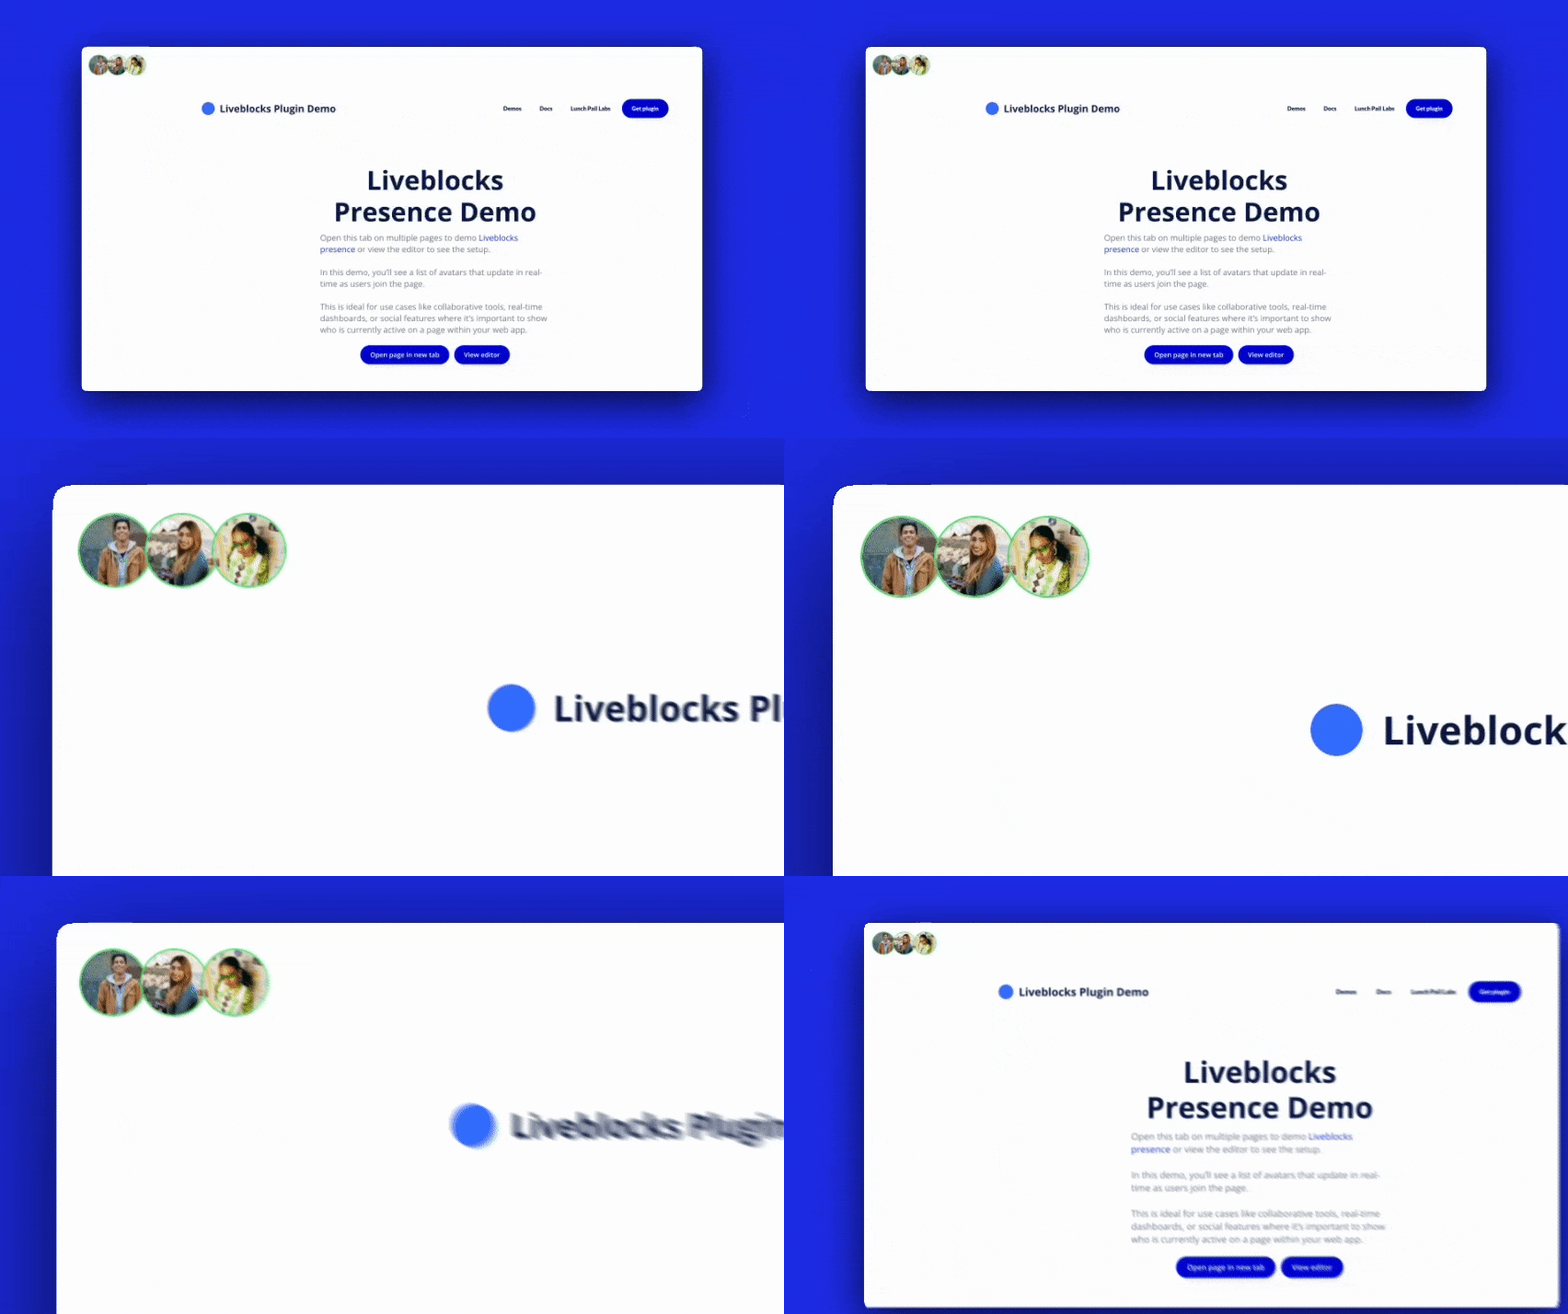
This tutorial covers how we set up presence in the demo app. For the exact setup from this tutorial, visit the [tutorial demo editor](https://bubble.io/page?id=lpl-liveblocks\&tab=tabs-2\&name=presence-tutorial\&type=page), or [try the live demo](https://lpl-liveblocks.bubbleapps.io/version-test/presence).
## Prerequisites
### 1. Install and set up the plugin:
If you haven’t already installed the Liveblocks plugin, you can find a step-by-step guide [here](/bubble/liveblocks/how-tos/set-up-plugin).
## Database
### 2. Set up the database
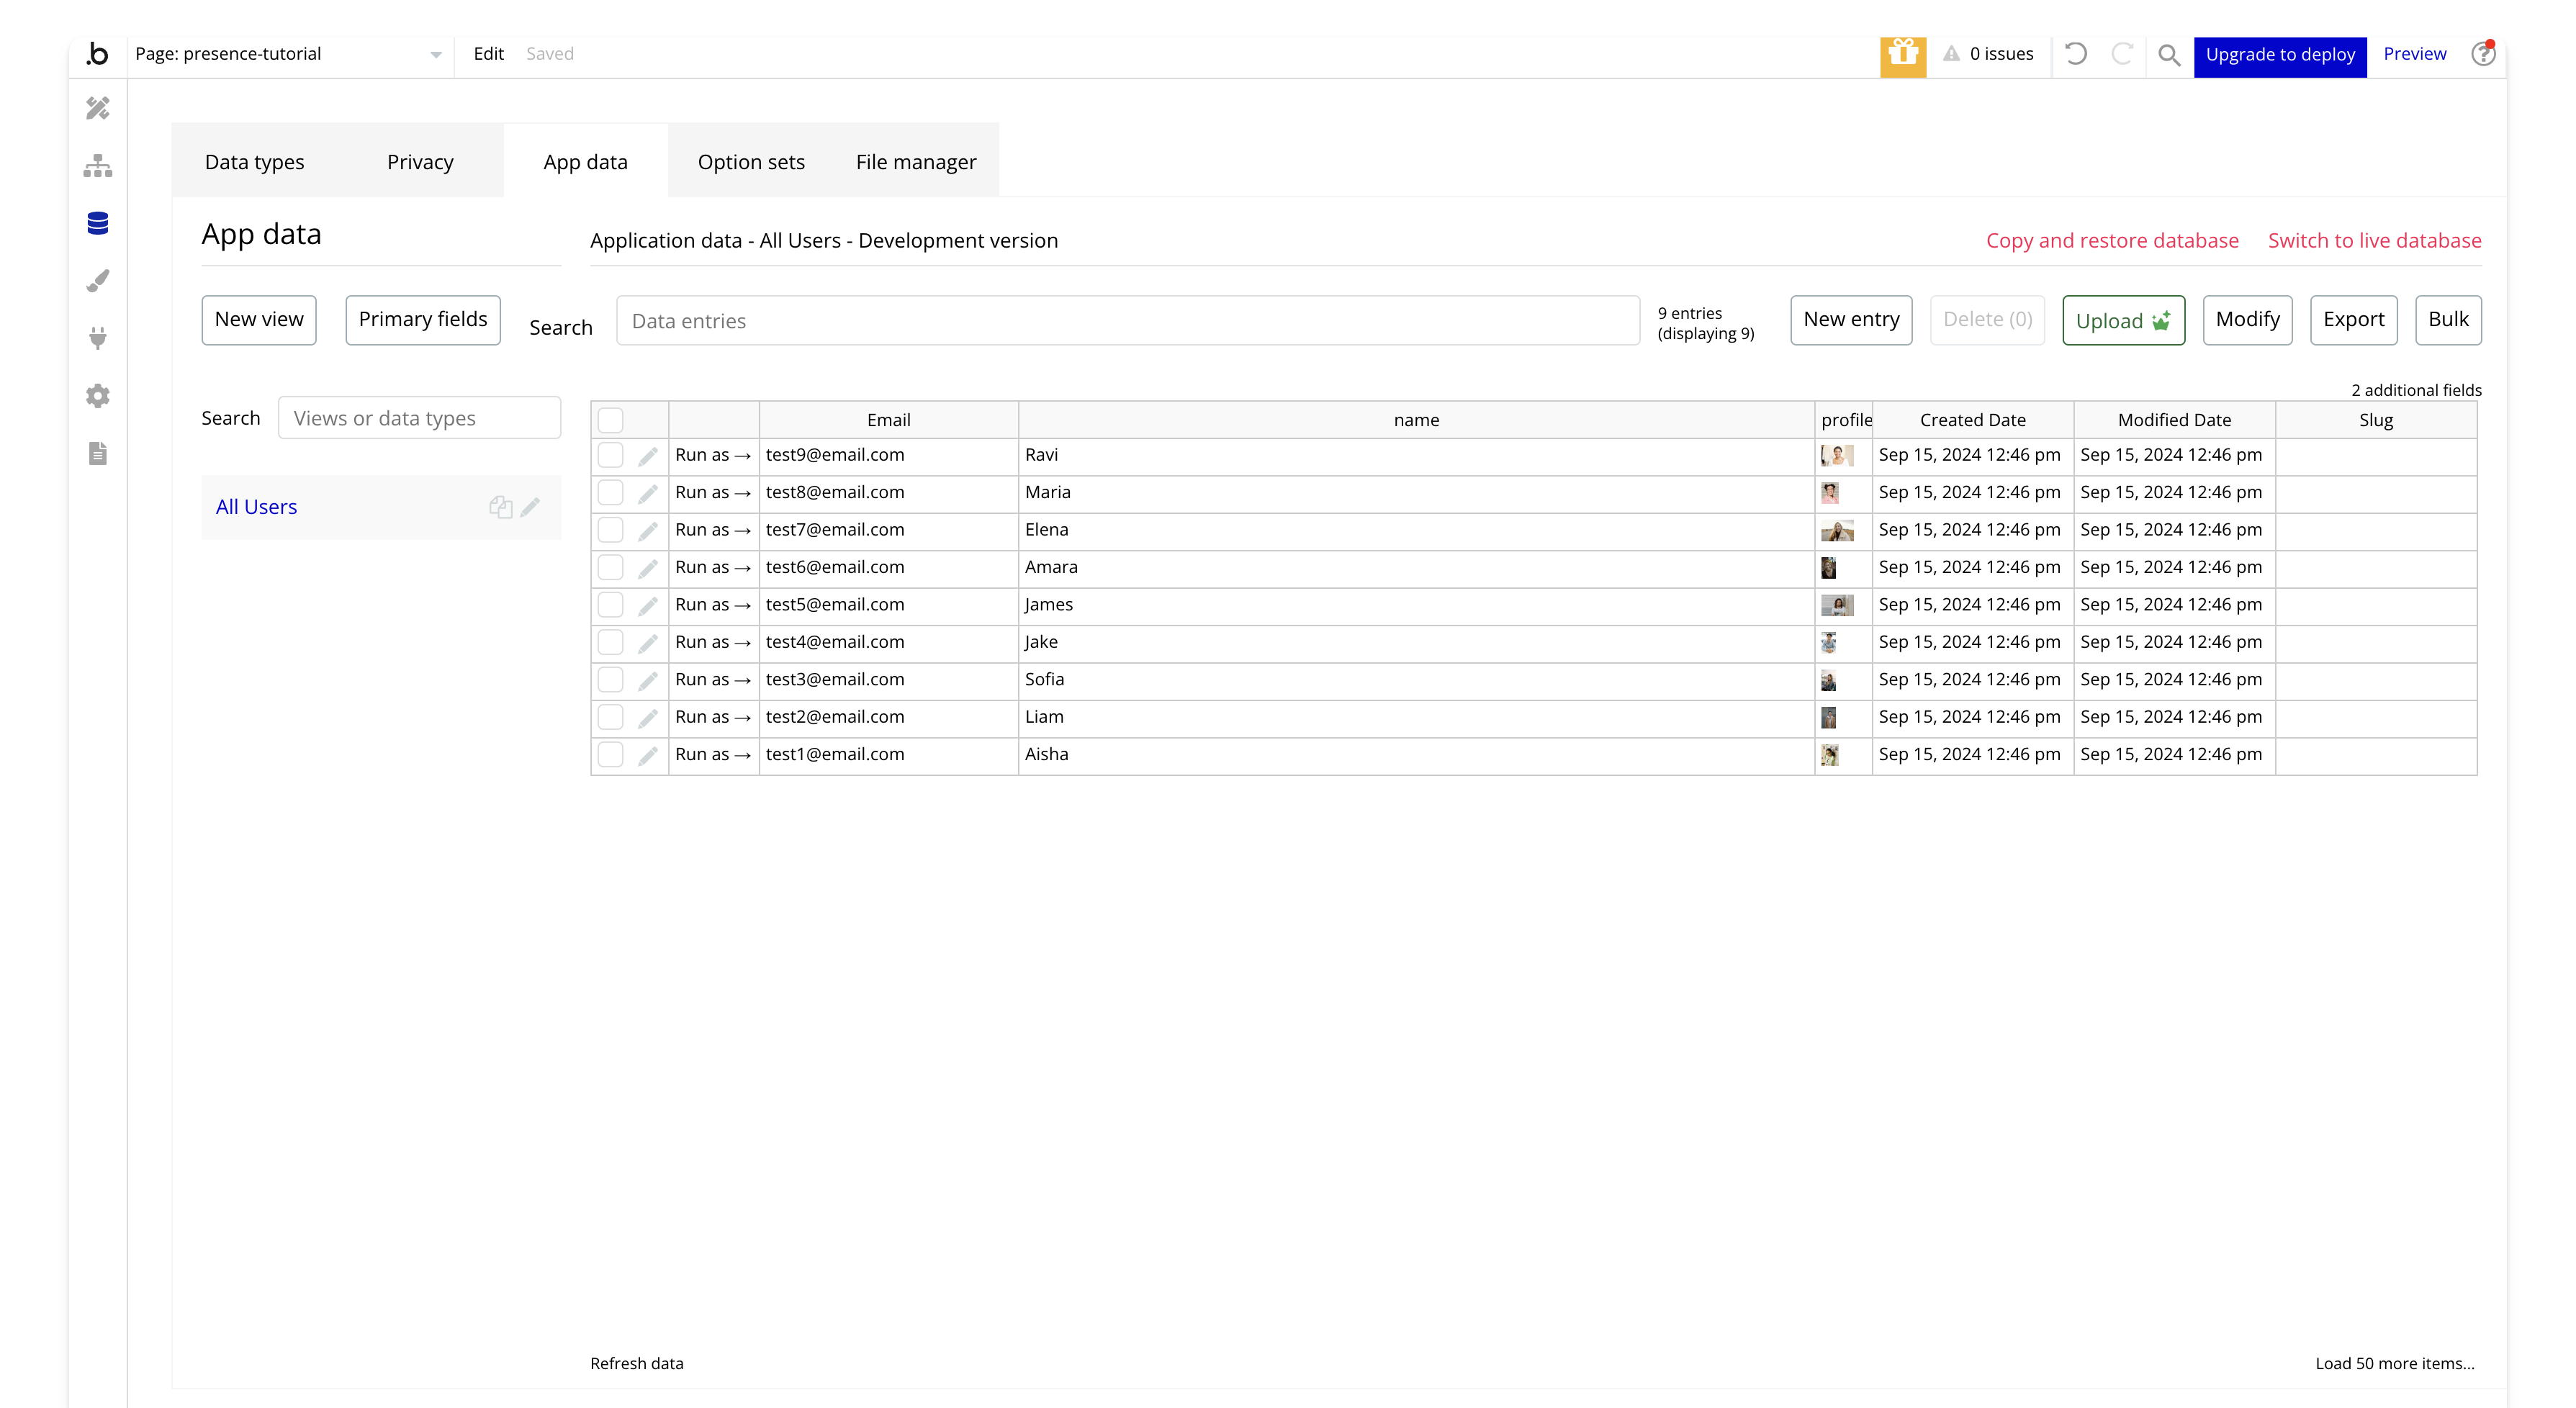
In this demo, we’ll display users that visit the page. To do this, we need to update the `User` data type in the database by adding a `name` and a `profile image`.
Go to the **Data** tab and create two new fields:
* `name` of type `text`
* `profile image` of type `image`

### 3. Update the privacy settings
For this demo, we’ll make the user data public to avoid setting up a login system. Go to the **Privacy** tab and check `View all fields` and `Find in searches` for everyone.
⚠️ In a production app, be more careful with privacy settings to protect user data.

### 4. Add Sample Data
Finally, add some user data. You can copy the [CSV file](https://drive.google.com/file/d/1xd2Dz6gGAWNcrIb_wGV4Y_vAr_8jDHDF/view?usp=sharing) and upload it into **Bubble** if you have a paid plan or trial, or manually add at least three users for this demo.
For convenience, here is a [folder with the photos](https://drive.google.com/drive/folders/18eG0YAkKcNOR2pBuT4jbilDLUH0-GESF?usp=sharing) if you are manually adding users.
## Design
Next is a simple design for the page. While not essential for using presence, it’s needed for the demonstration. If you want to skip ahead to the element setup, jump to the [section on adding the presence element](#5-adding-the-liveblocks-presence-element).
### 3. Create a New Page
In your Bubble app, create a new page.

Give the page a name. For this tutorial, I’m calling it `presence-tutorial`.

### 4. Setting up the page
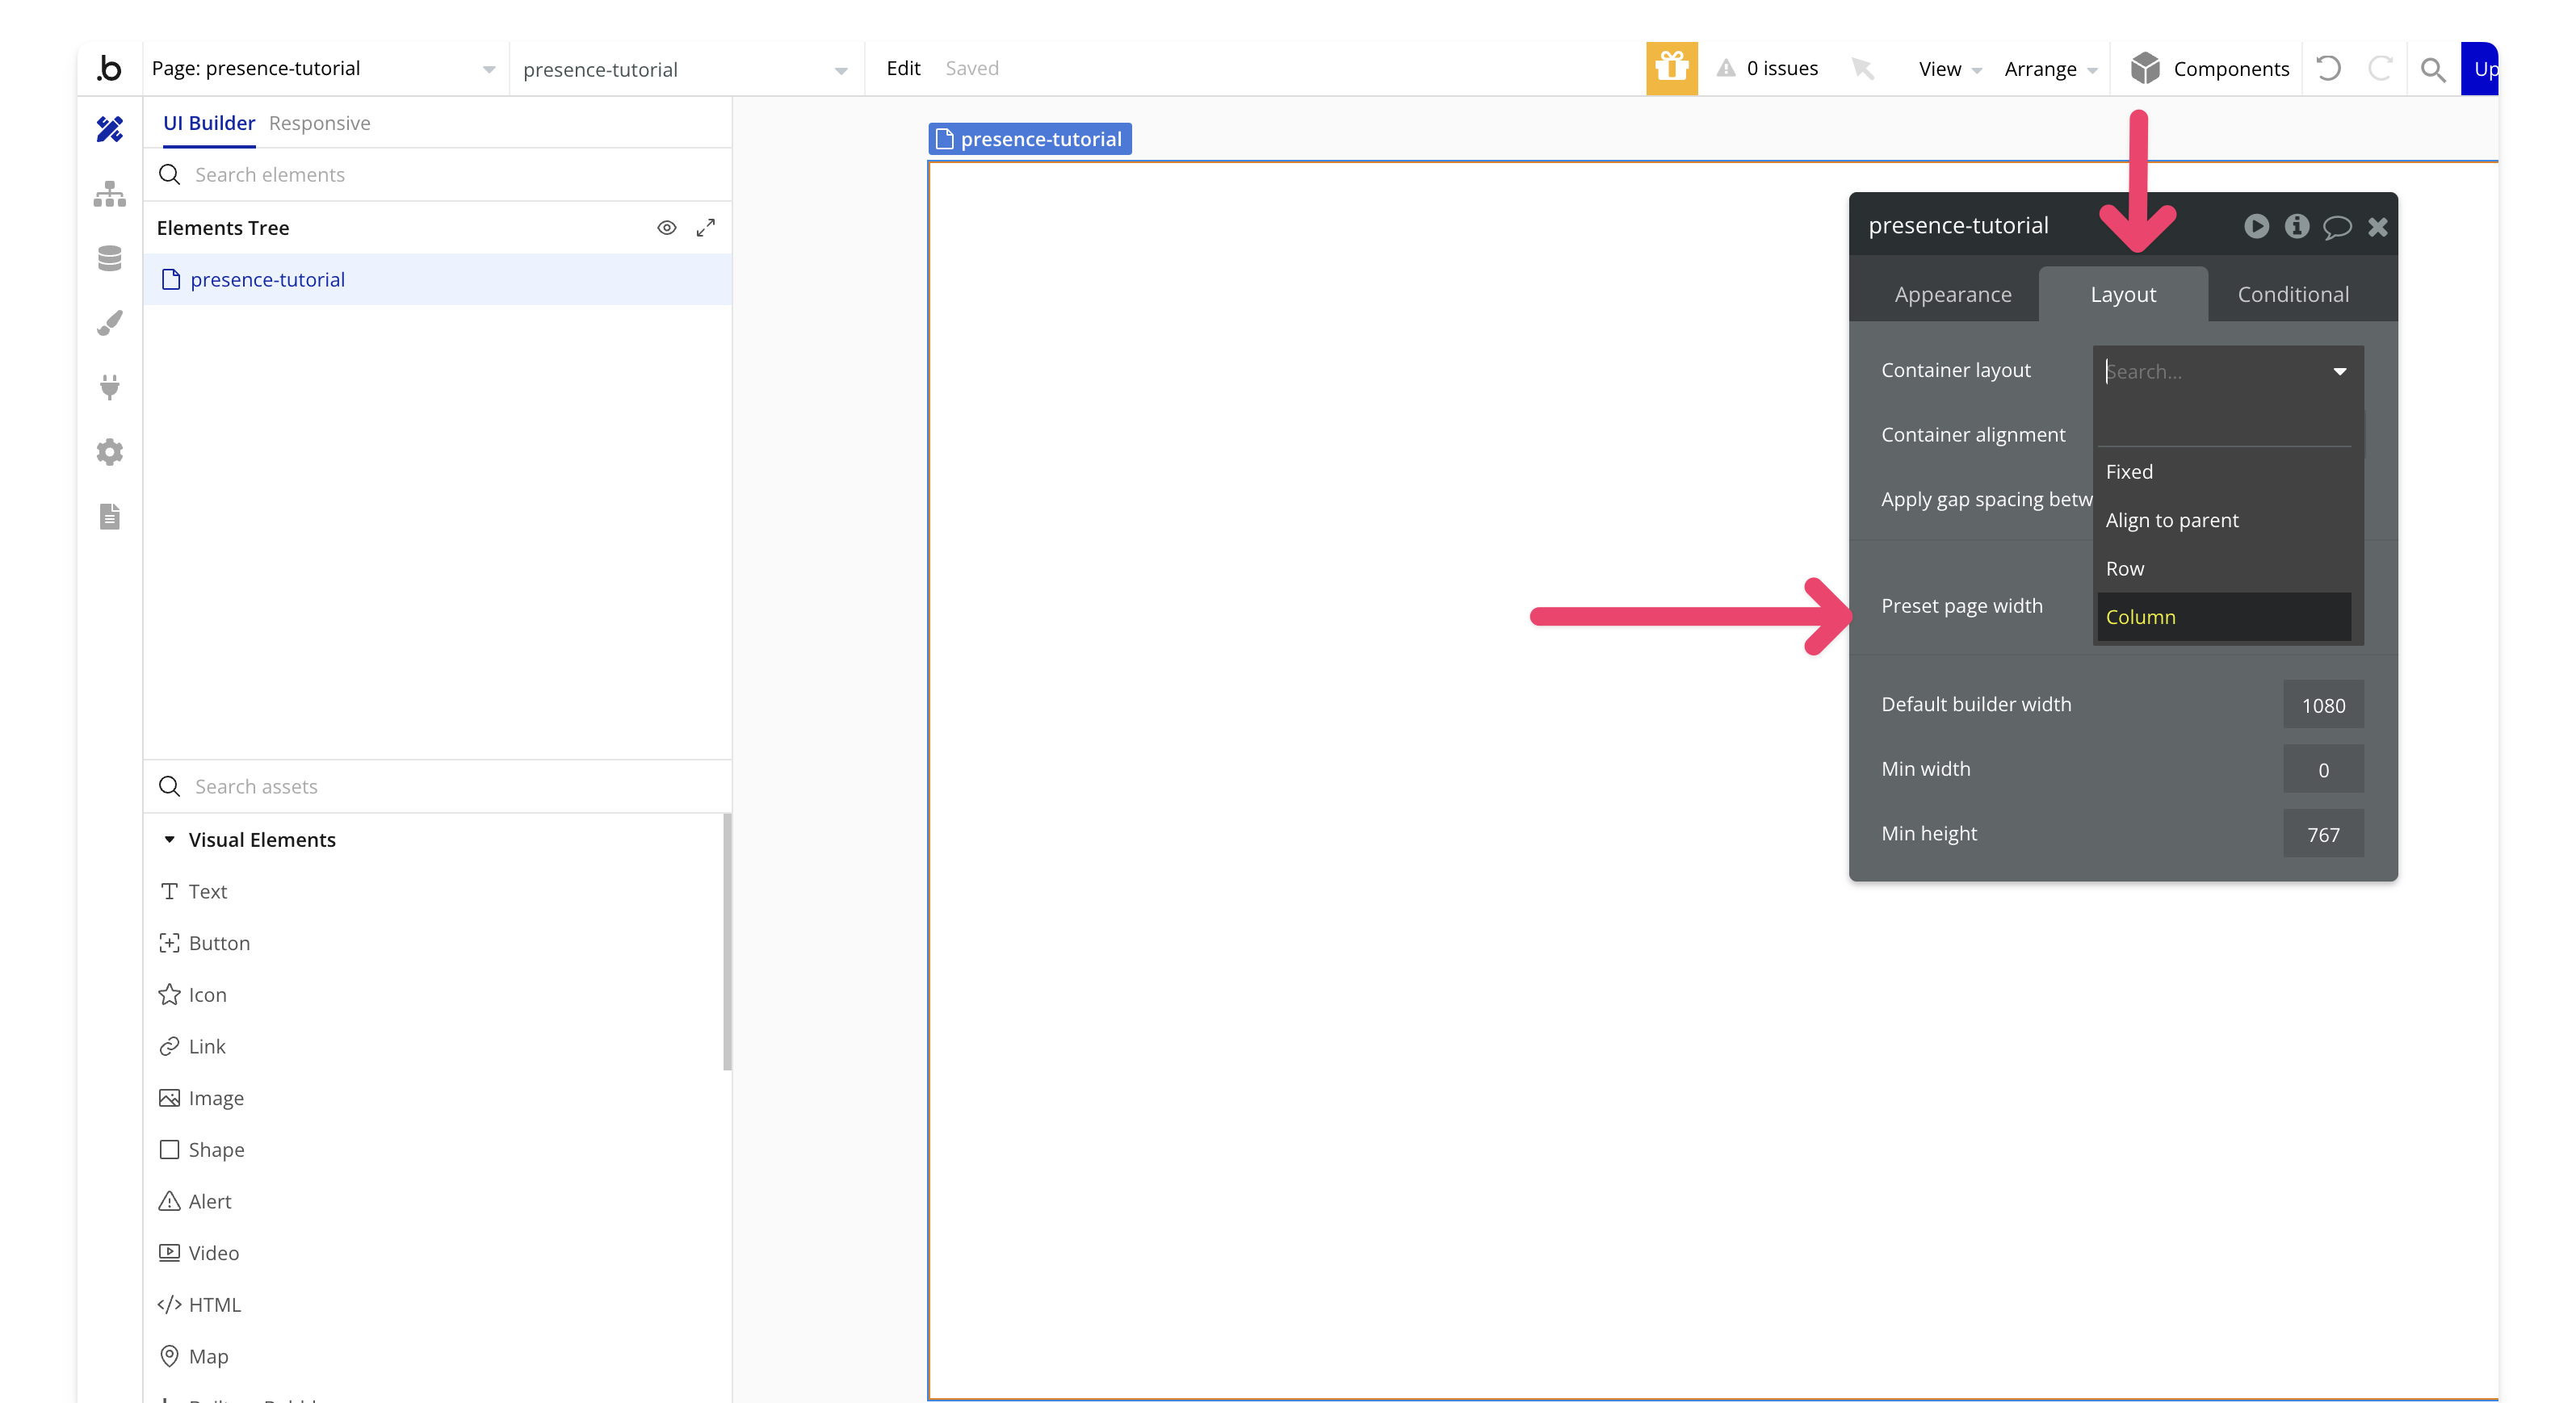
Change the layout of the page. Click on the page until the property editor opens, then go to the **Layout** tab and select `column` instead of `fixed`.
### 5. Adding the Liveblocks presence element
Add a hidden popup to house the presence element. This keeps it organized and out of the way.
Drag a popup onto your page and rename it `hidden popup`.

Search for `liveblocks-presence` and drag it into the popup to track who’s online.

### 6. Add a floating group
Create a `floating group` that will later house our repeating group for avatars.
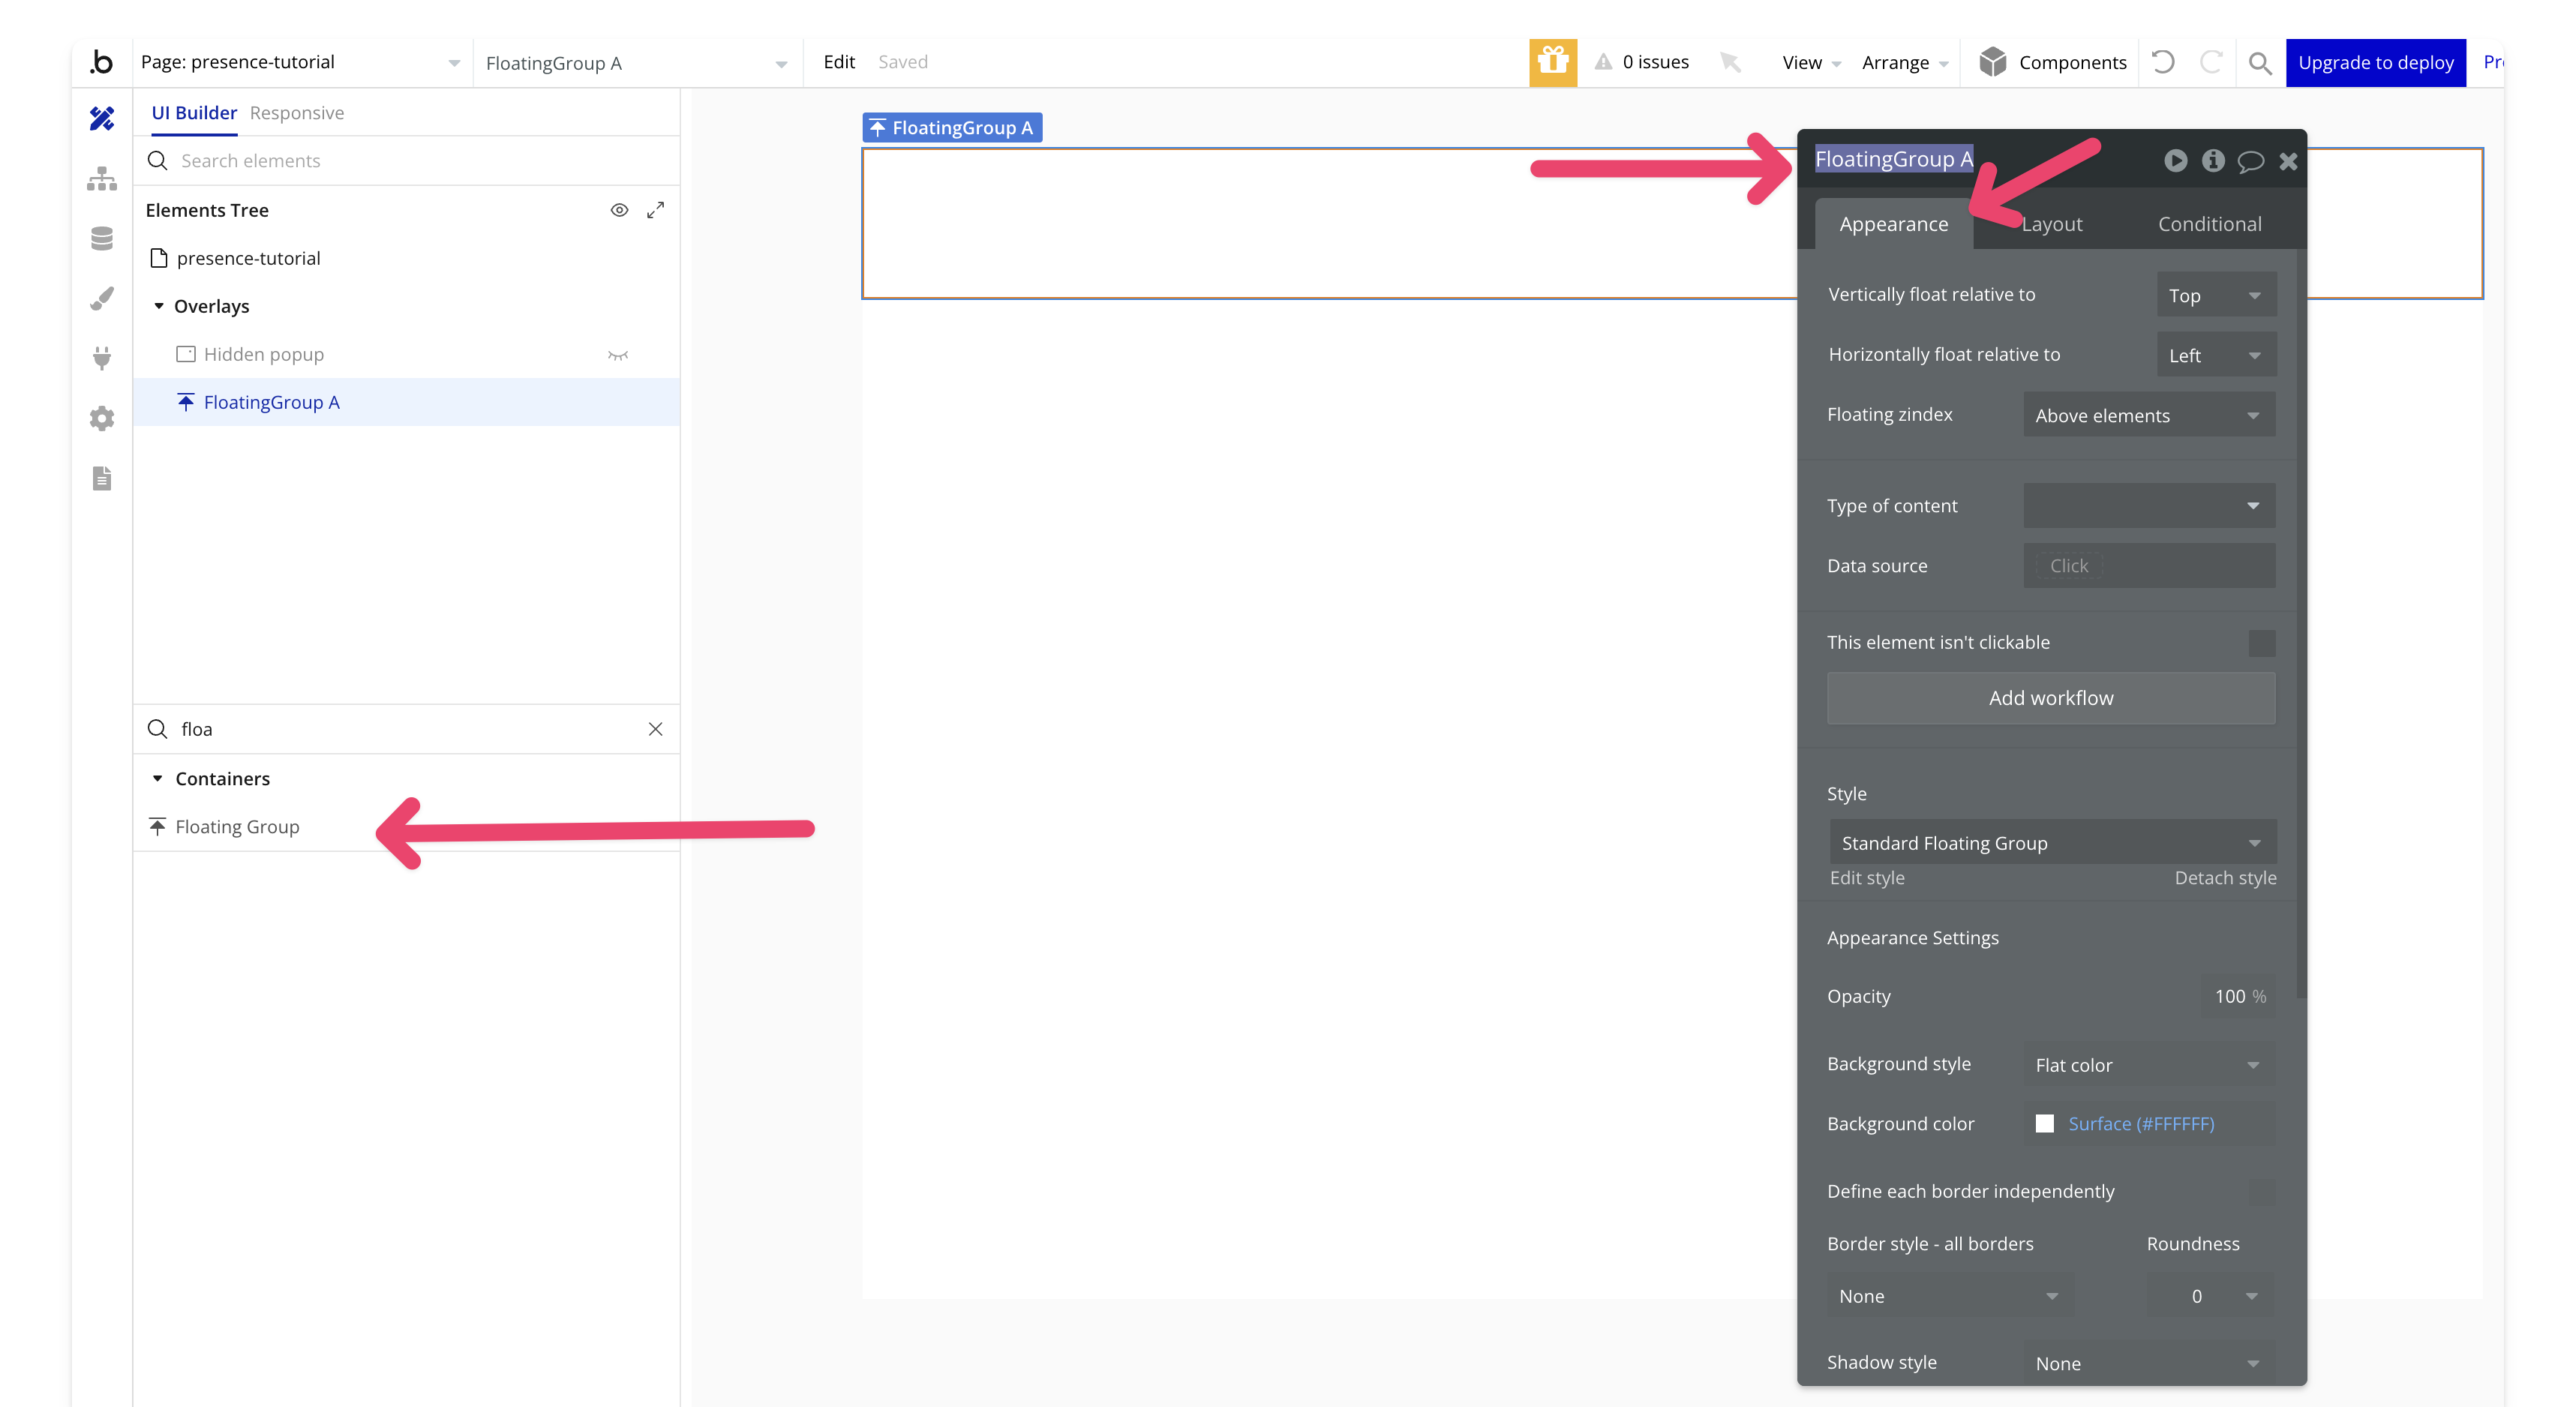
Search for `floating group` in your assets and drag it onto the page. In the **Appearance** tab, set the following:
* Vertically float relative to: `top`
* Horizontally float relative to: `left`
* Floating z-index: `above elements`
In the **Layout** tab, uncheck `make this element fixed-width` and `fixed-height`. Set the `min-width` to 100% and `min-height` to 100px, then check `fit height to content`.

### 7. Add a repeating group
Add a `repeating group` from the assets to the `floating group`. Set the **type of content** to `text` and the **data source** to `Liveblocks-presence (testing) A's everyone`. This data source holds all users in the room, including the local user.
In the **Appearance** tab, set the following:
* Check `set fixed number of rows`
* Set `rows` to 1
* Uncheck `set fixed number of columns`
* Set `minimum width of the column` to 20%
* Set `separators` to `none`
* Set `border` to `none`

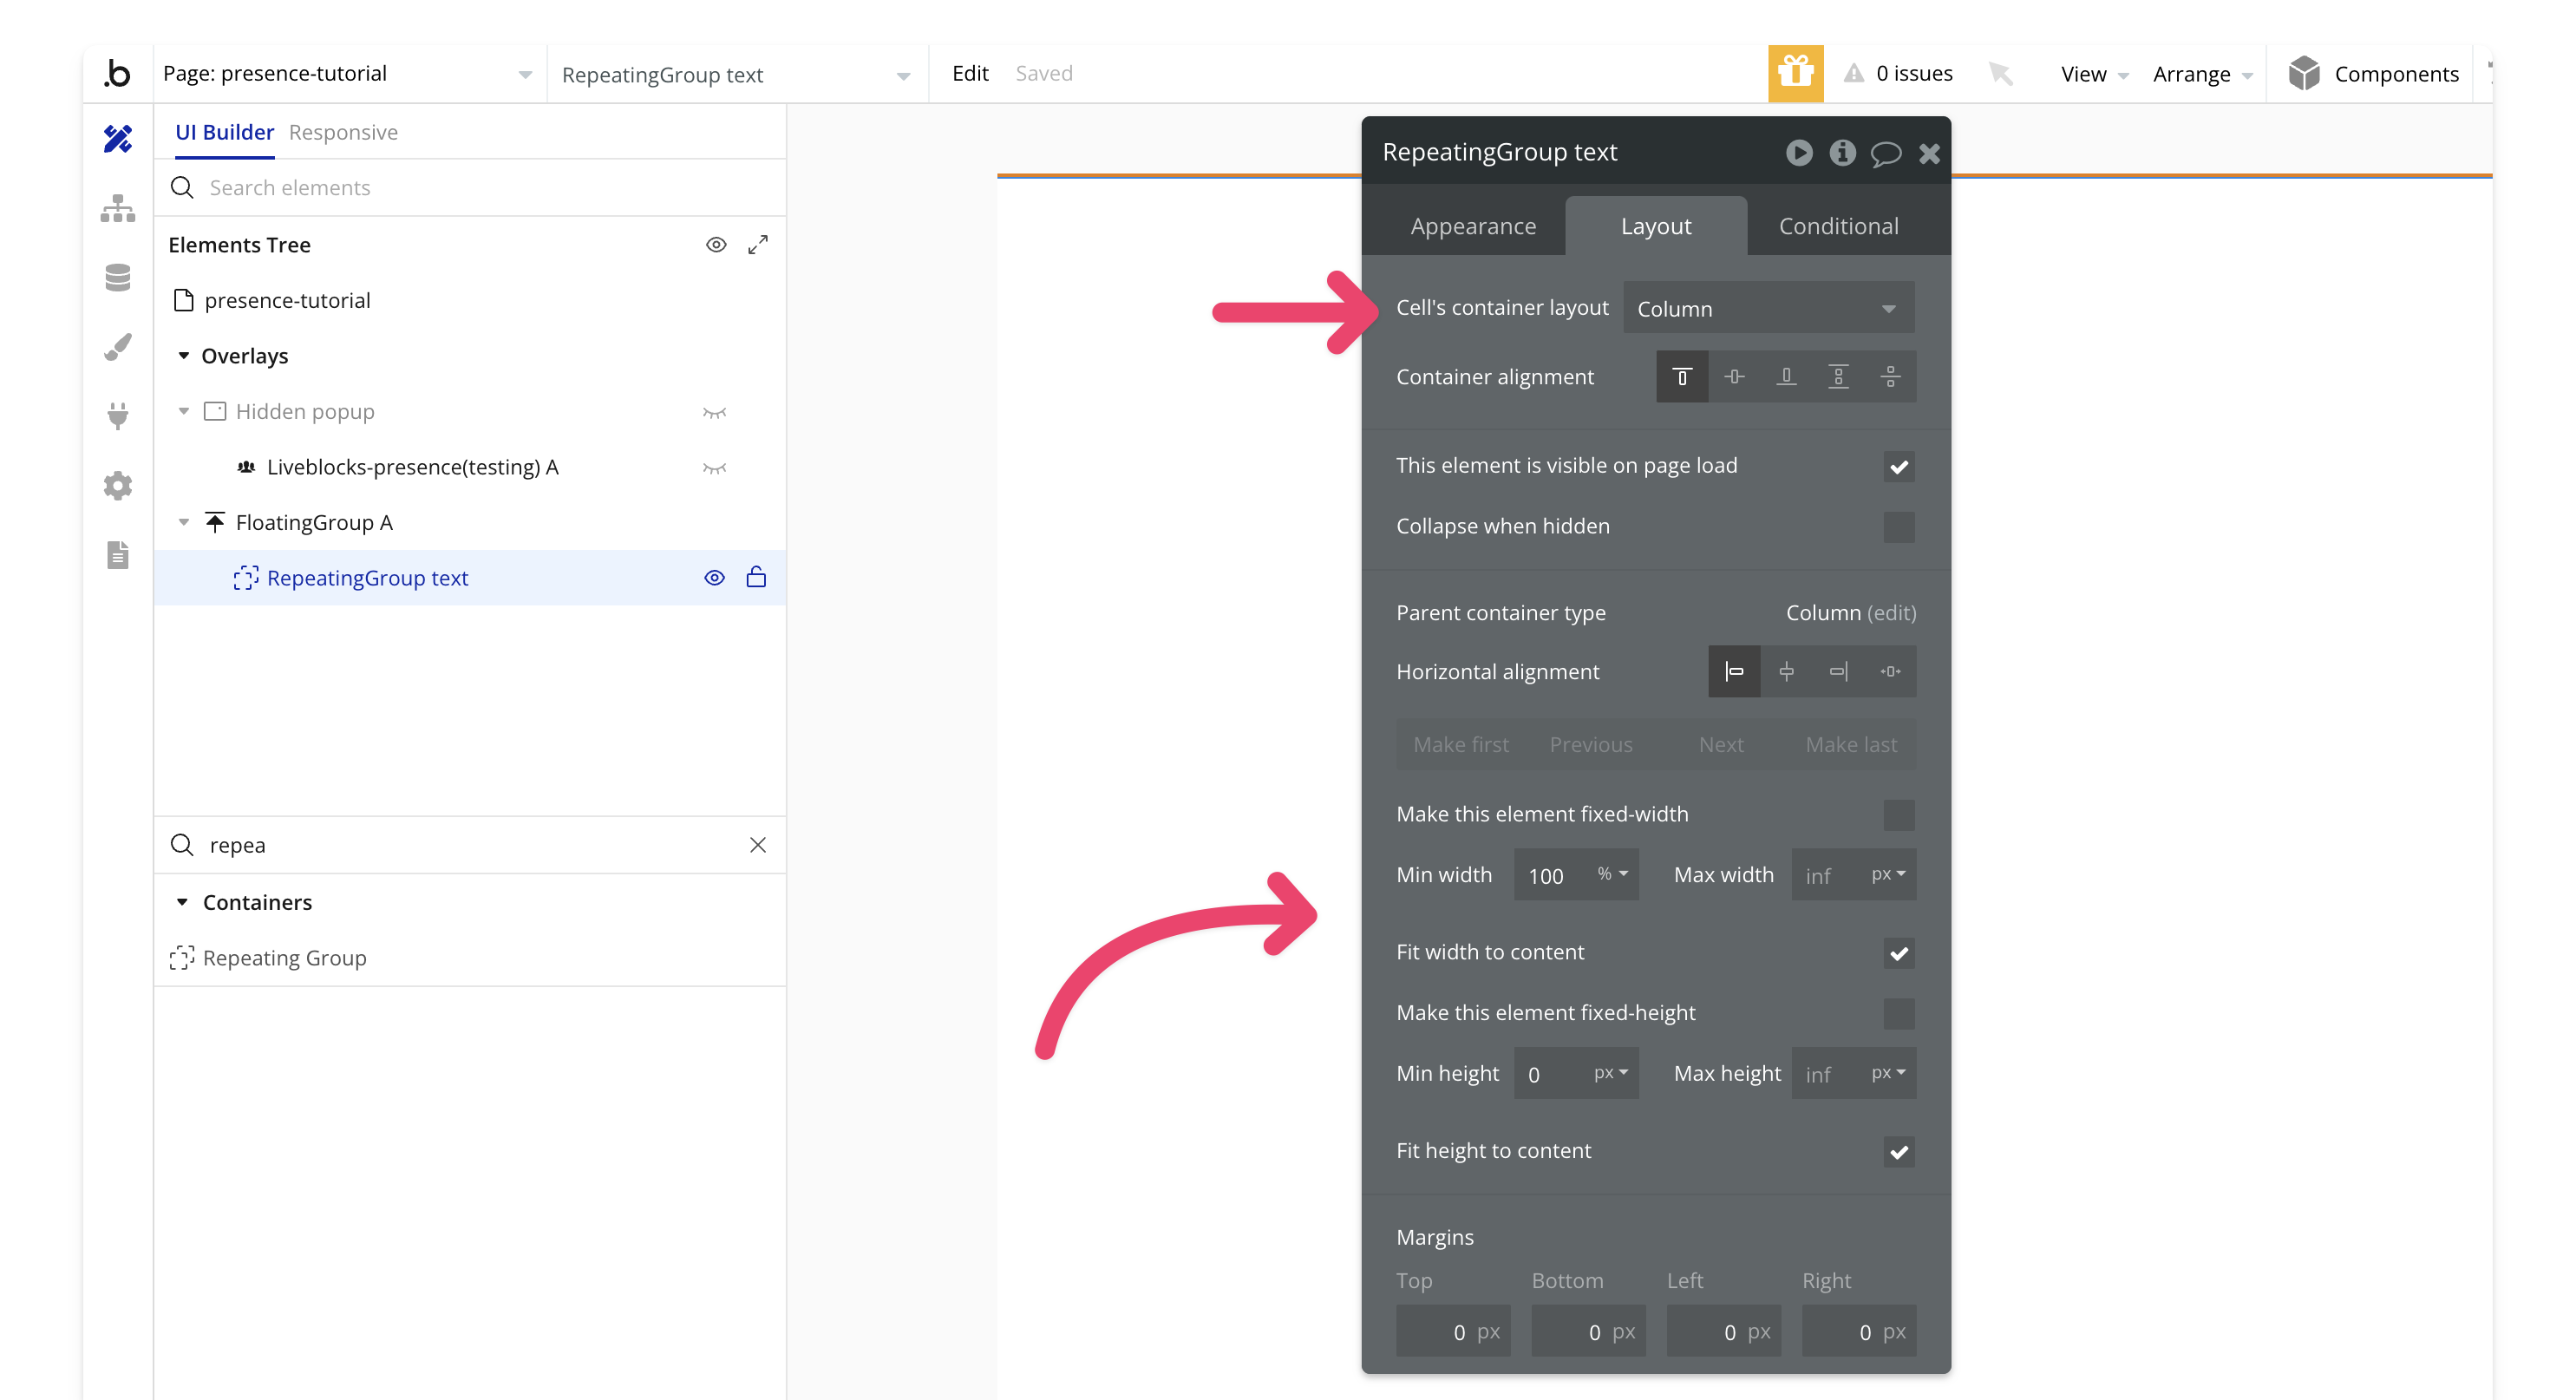
In the **Layout** tab, set the following:
* Set `cell's container layout` to `column`
* Set `container alignment` to `top`
* Check `element is visible on page load`
* Uncheck `make this element fixed-width`
* Uncheck `make this element fixed-height`
* Set `min height` to 0
* Check `fit height to content`
### 8. Create the avatar
Create a `group user` that will display the profile image of users when they are on the page.
Add a group to the repeating group, name it `group user`, and set the **type of content** to `user`.

Set the data source to `do a search for`, make the **type** `user`, and set the unique id to `current cell's text`. This data source is a list of user IDs (which we'll set later), matching Bubble's unique IDs.

Add an `image` element to the `group user` and set the image to `Parent group's user's profile image`. Enable **Imgix** and the following settings:
* Check `auto enhance the image`
* Set `quality` to 100
* Check `resize to fit dimensions by cropping`
* Check `apply a circle/ellipse mask`
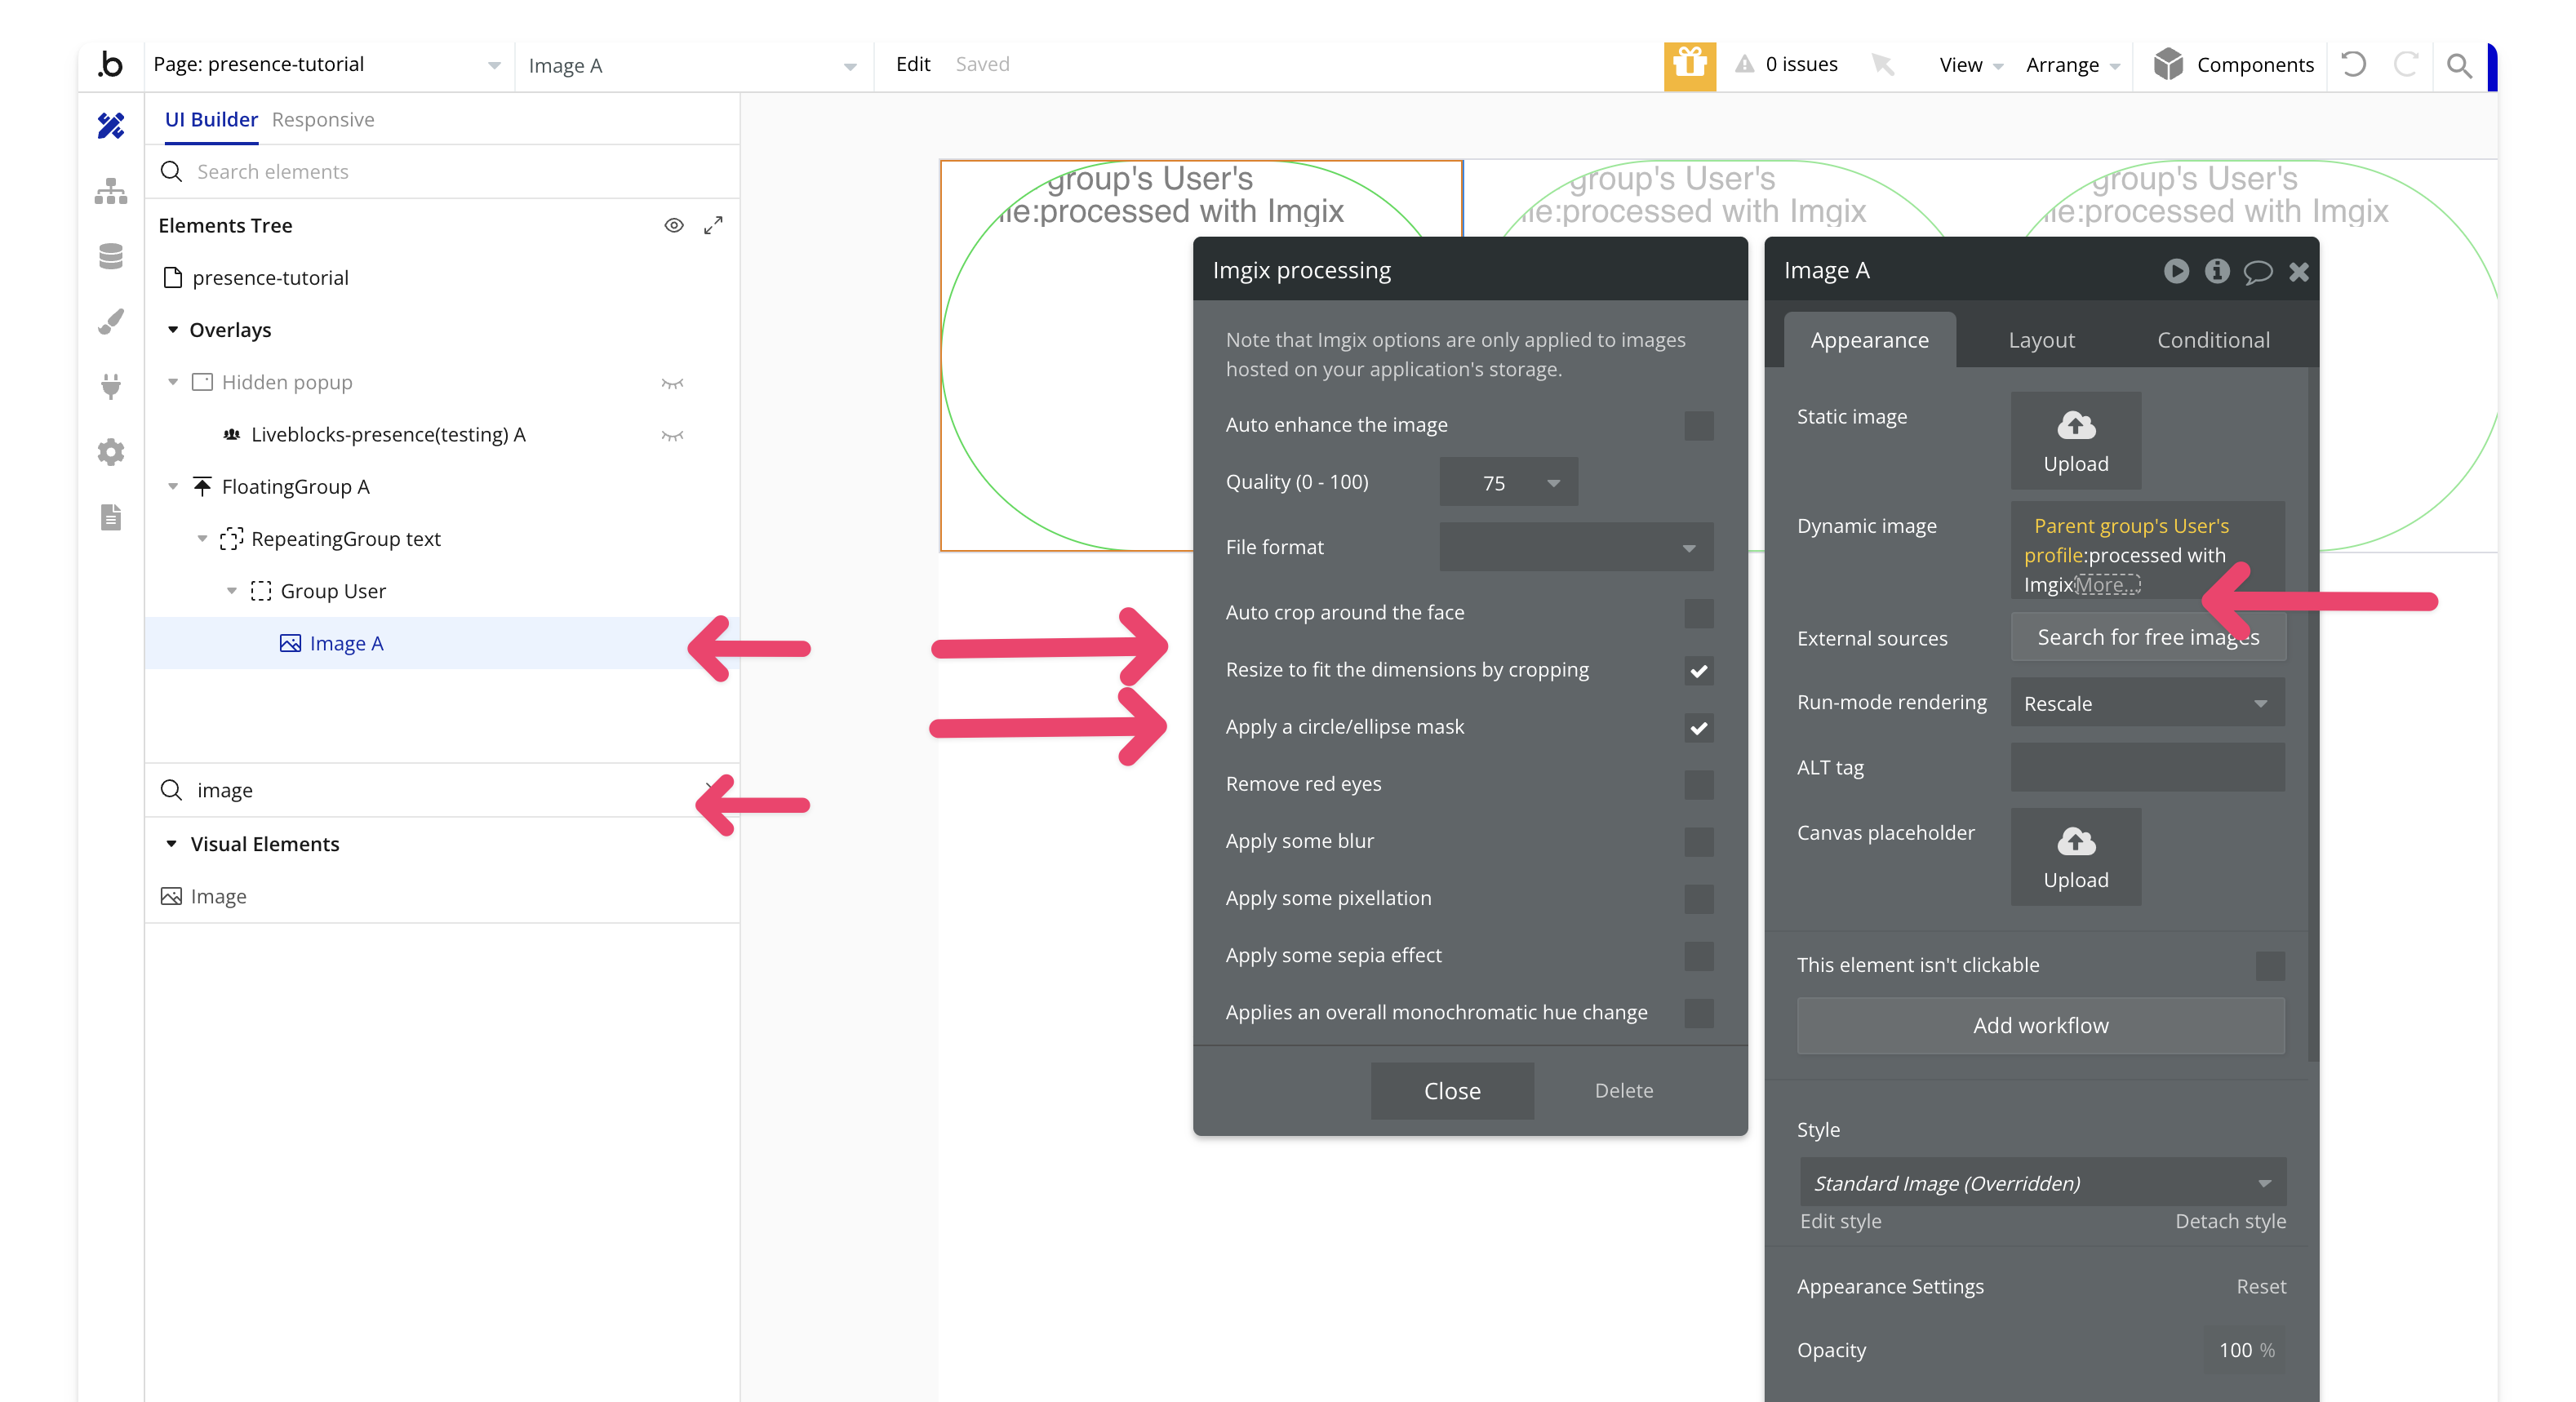
Add a border with `solid color #177db4e` and set a tooltip to display the `parent group's user's name`.

In the **Layout** tab, set the **width** to 50px, check `keep element aspect ratio fixed`, and set the aspect ratio to `1x1`.

That's it for setting up the design!
## Workflows
Workflows are where most of the interaction with Liveblocks will happen.
### 9. Create a room
Create a workflow that runs on page load to create a room for the demo.
On page load, add the `Liveblocks - create room` action. Set the `Room ID` to `tutorial` and the `Default Access` to `public`.
Add a new event: `When page is loaded`.
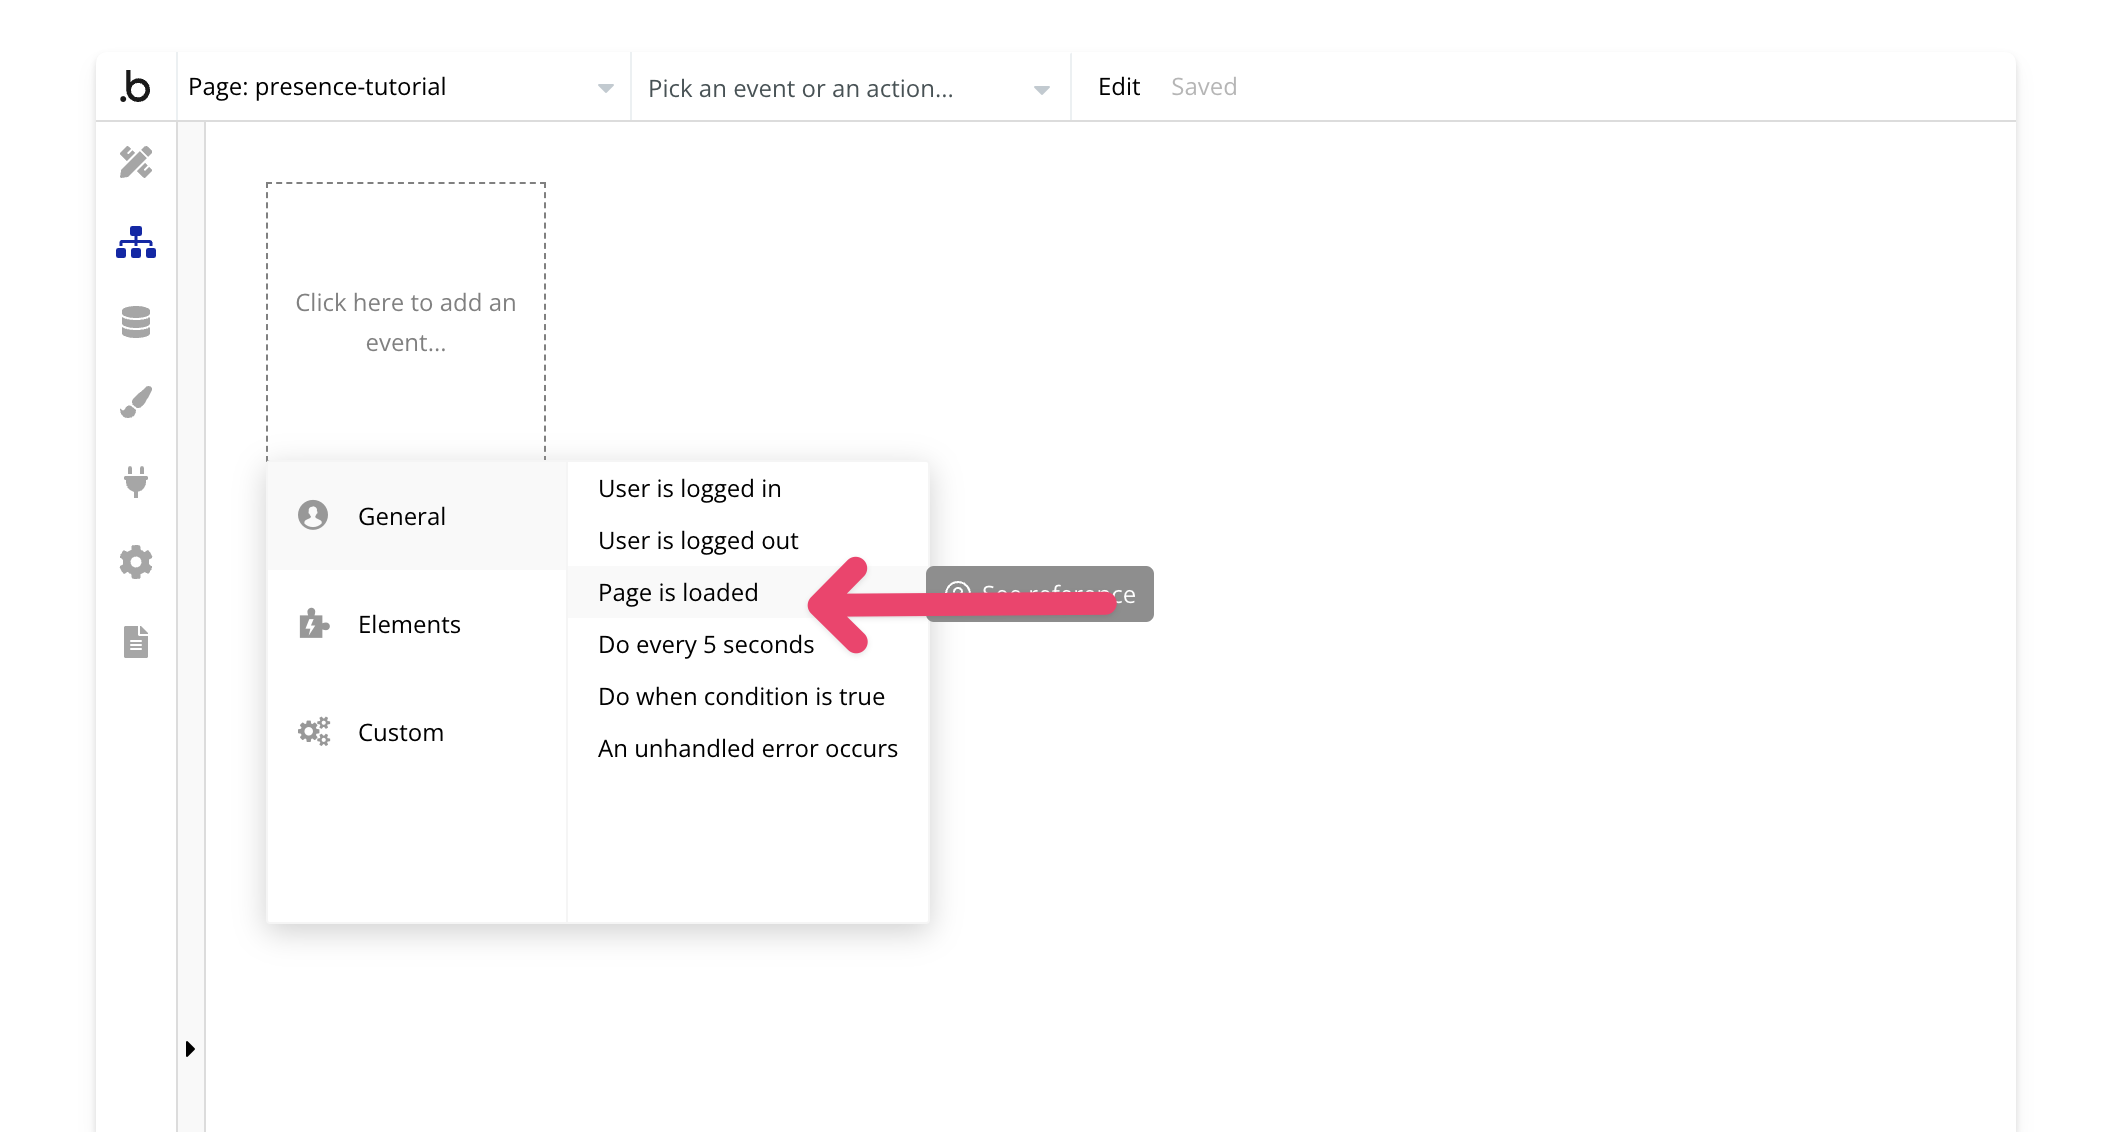
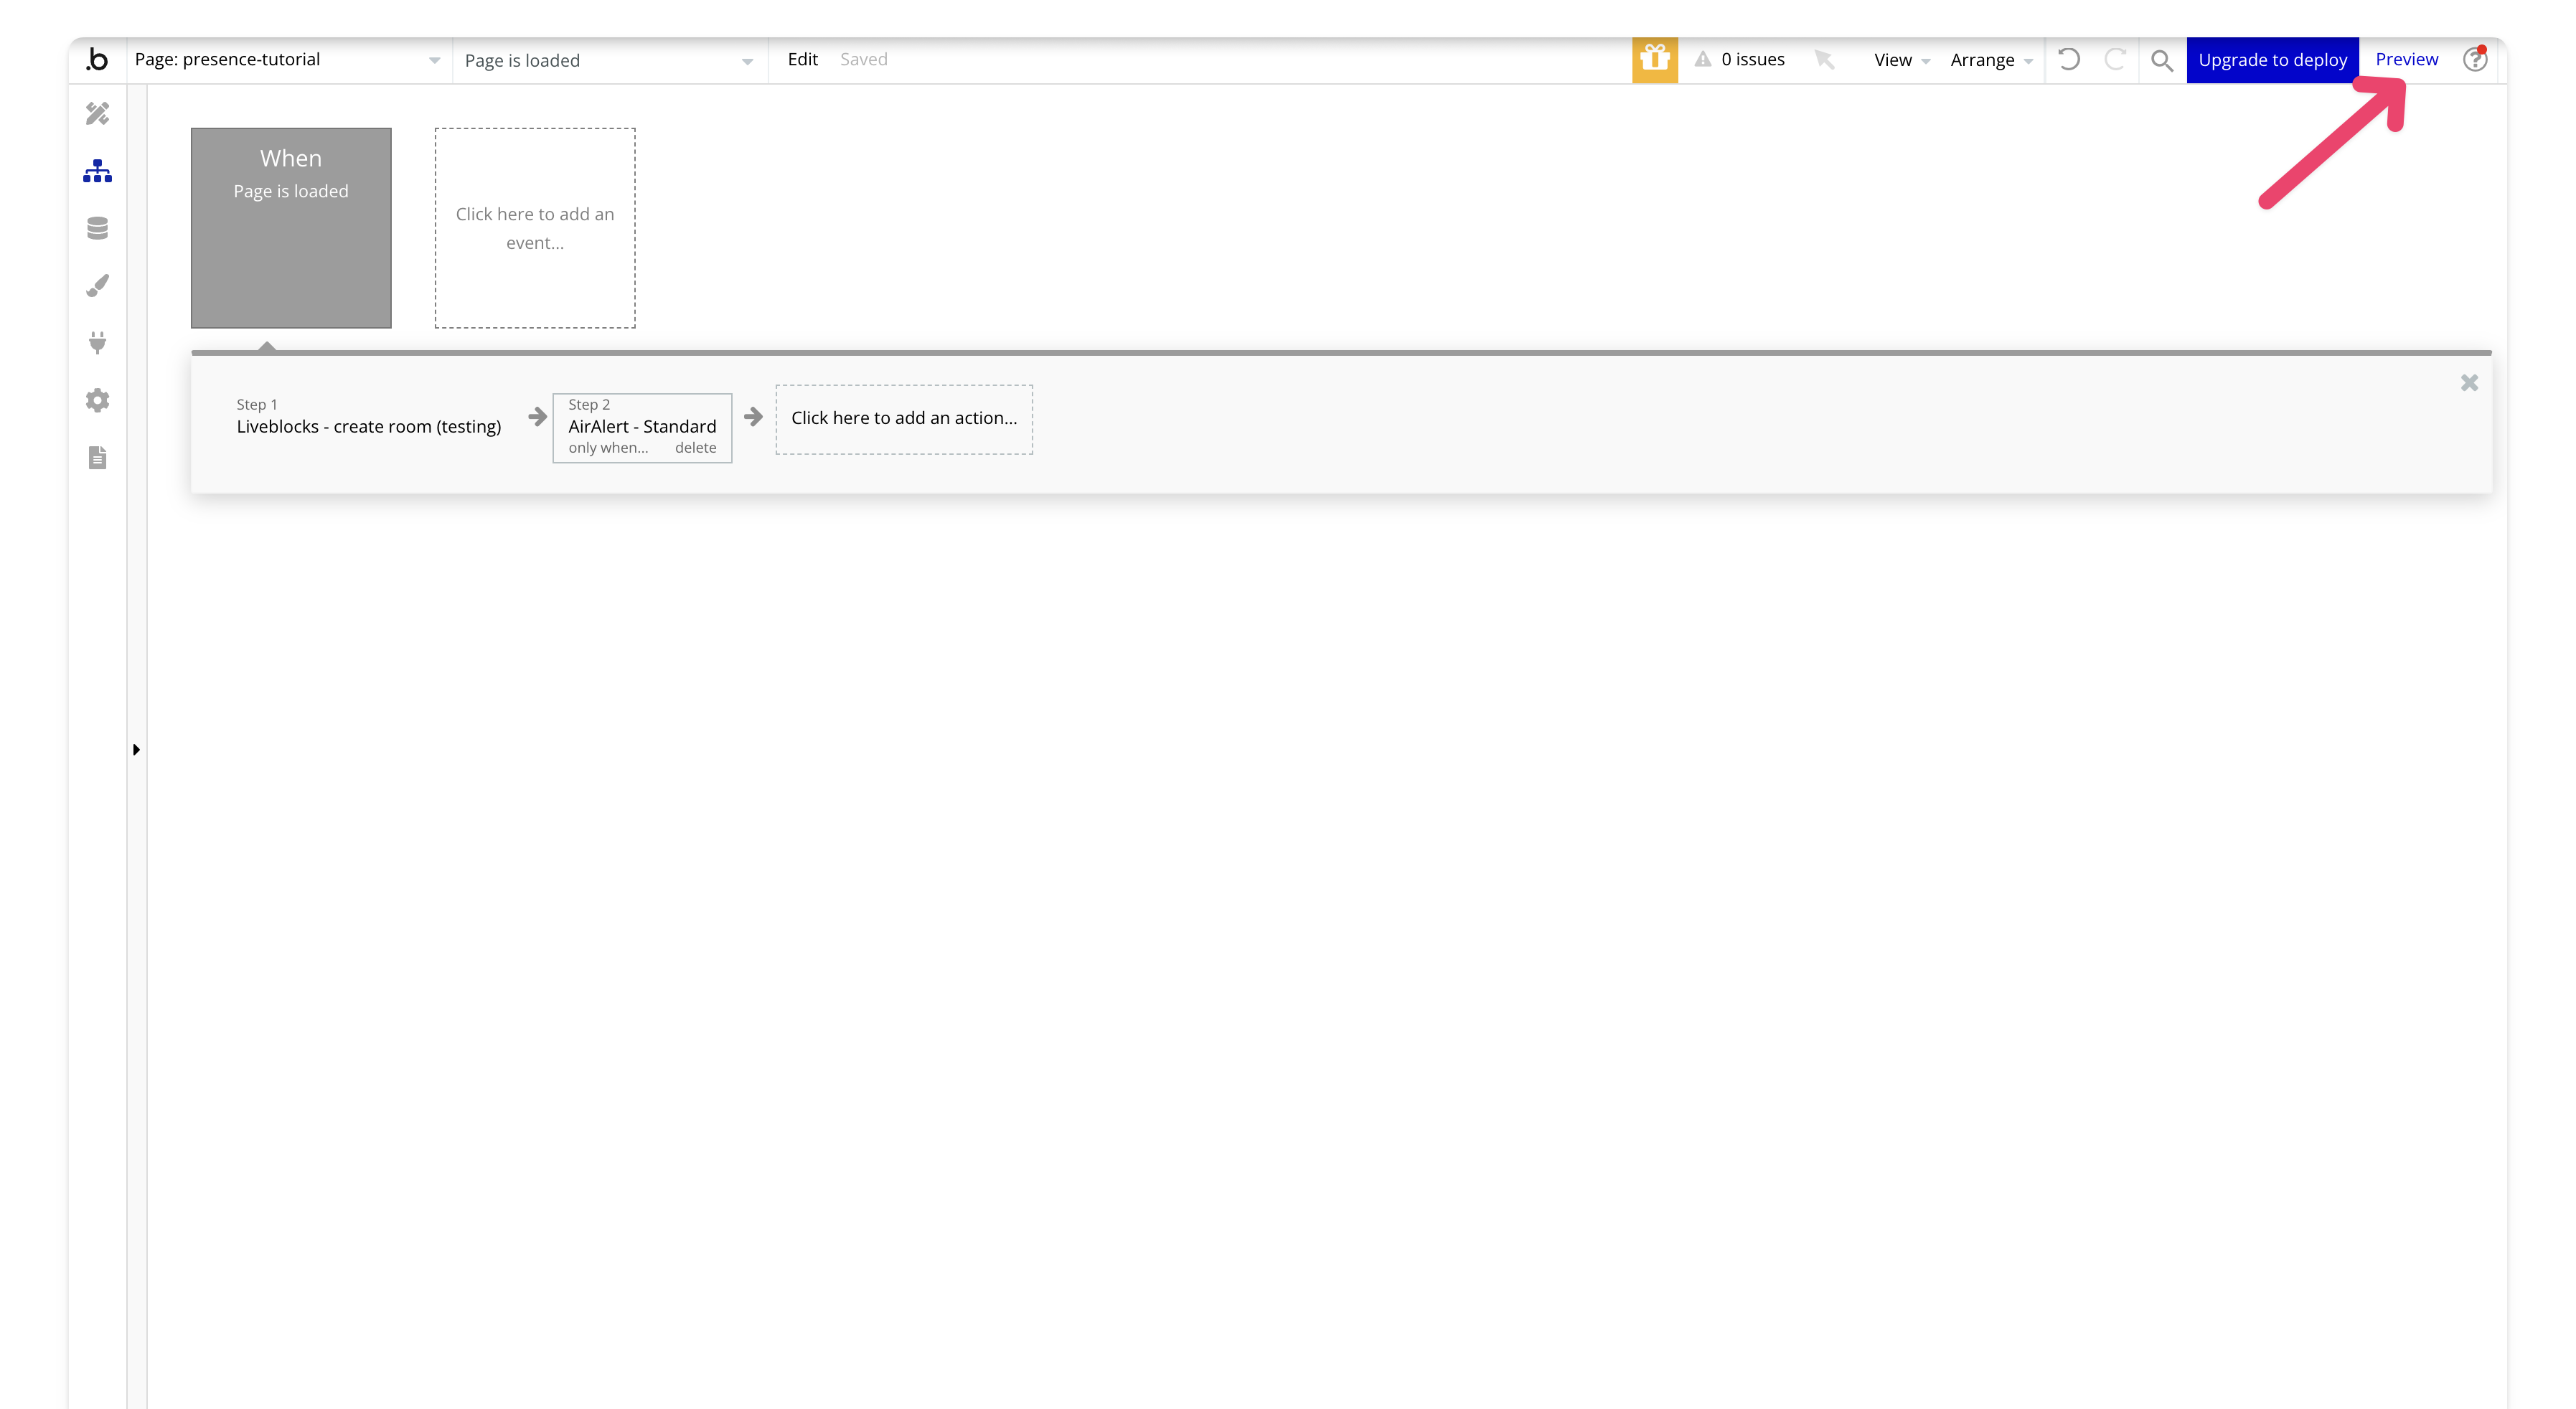
Then add the `Liveblocks - create room` action.

Add the [Air Alert plugin](https://bubble.io/plugin/airalert-1515787032525x876315403042684900) for confirmation. We'll use it to show an alert with the room name after the room is created.

Preview the page to confirm that the room was created successfully.
Great! Now that the room is created, we can move on to entering the room.
### 10. Workflow to enter a room
You can now disable the `on page load` workflow—we won't need it anymore since our room is created.
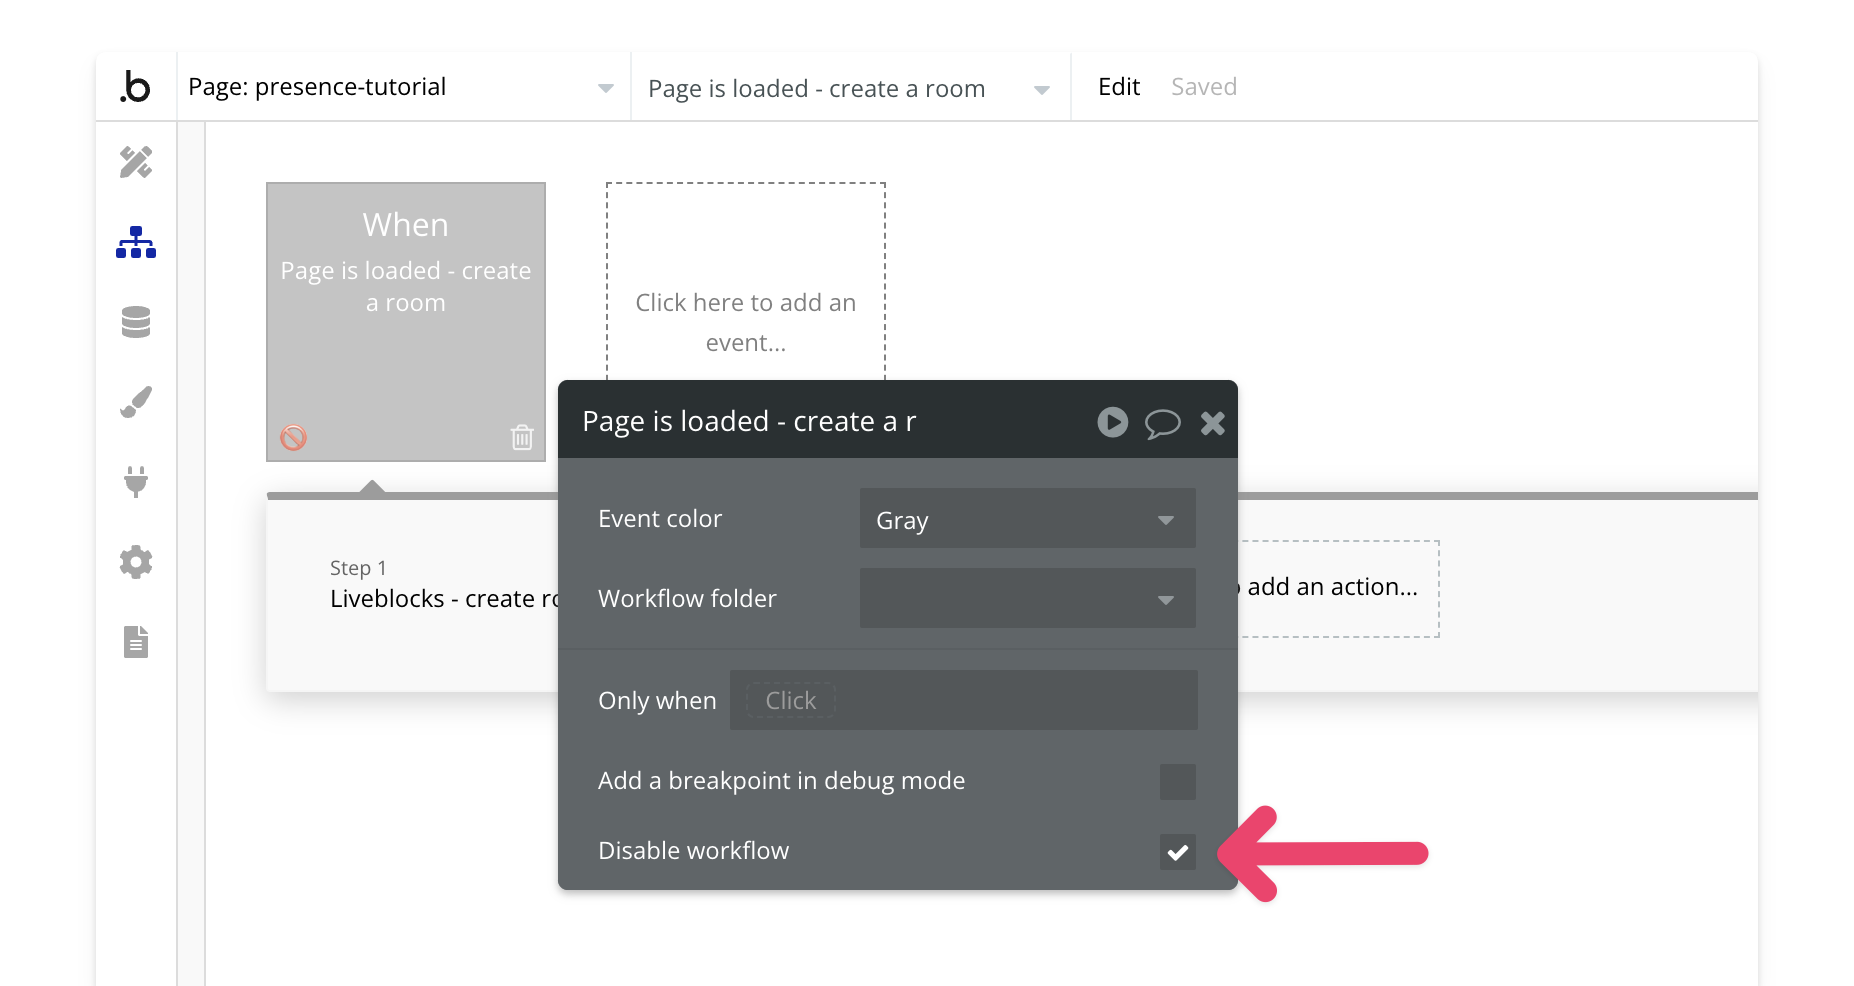
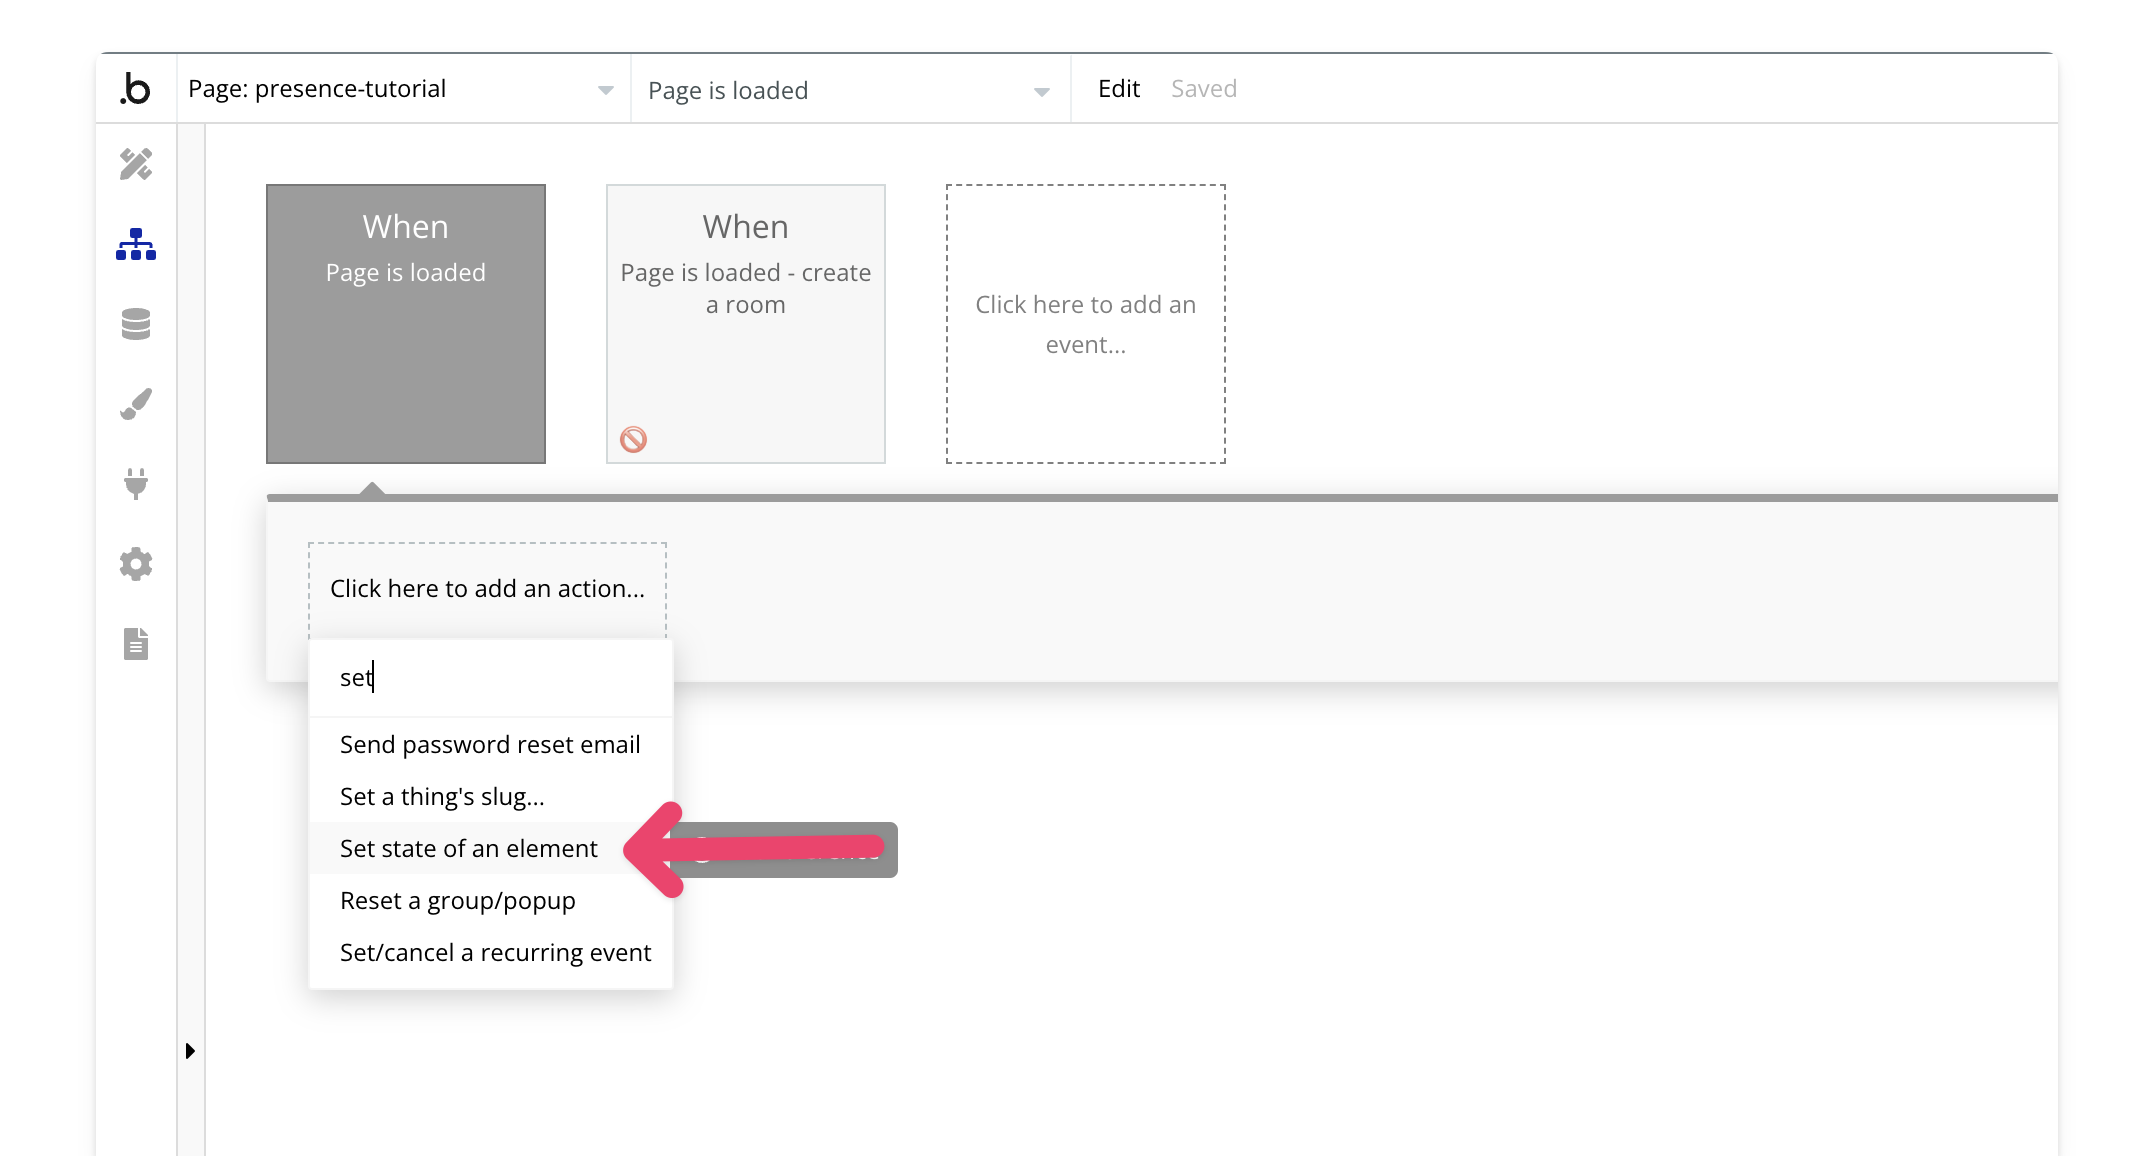
Create a new `page is loaded` workflow. We will add an action to set the state of an element. In Bubble, states allow you to store information within elements. For this demo, we'll use states to store a random user ID from our database to simulate a random user. In a real production app, you'd use the current user's unique ID, but we're avoiding login for this tutorial.
Add a new action to set the state of an element:
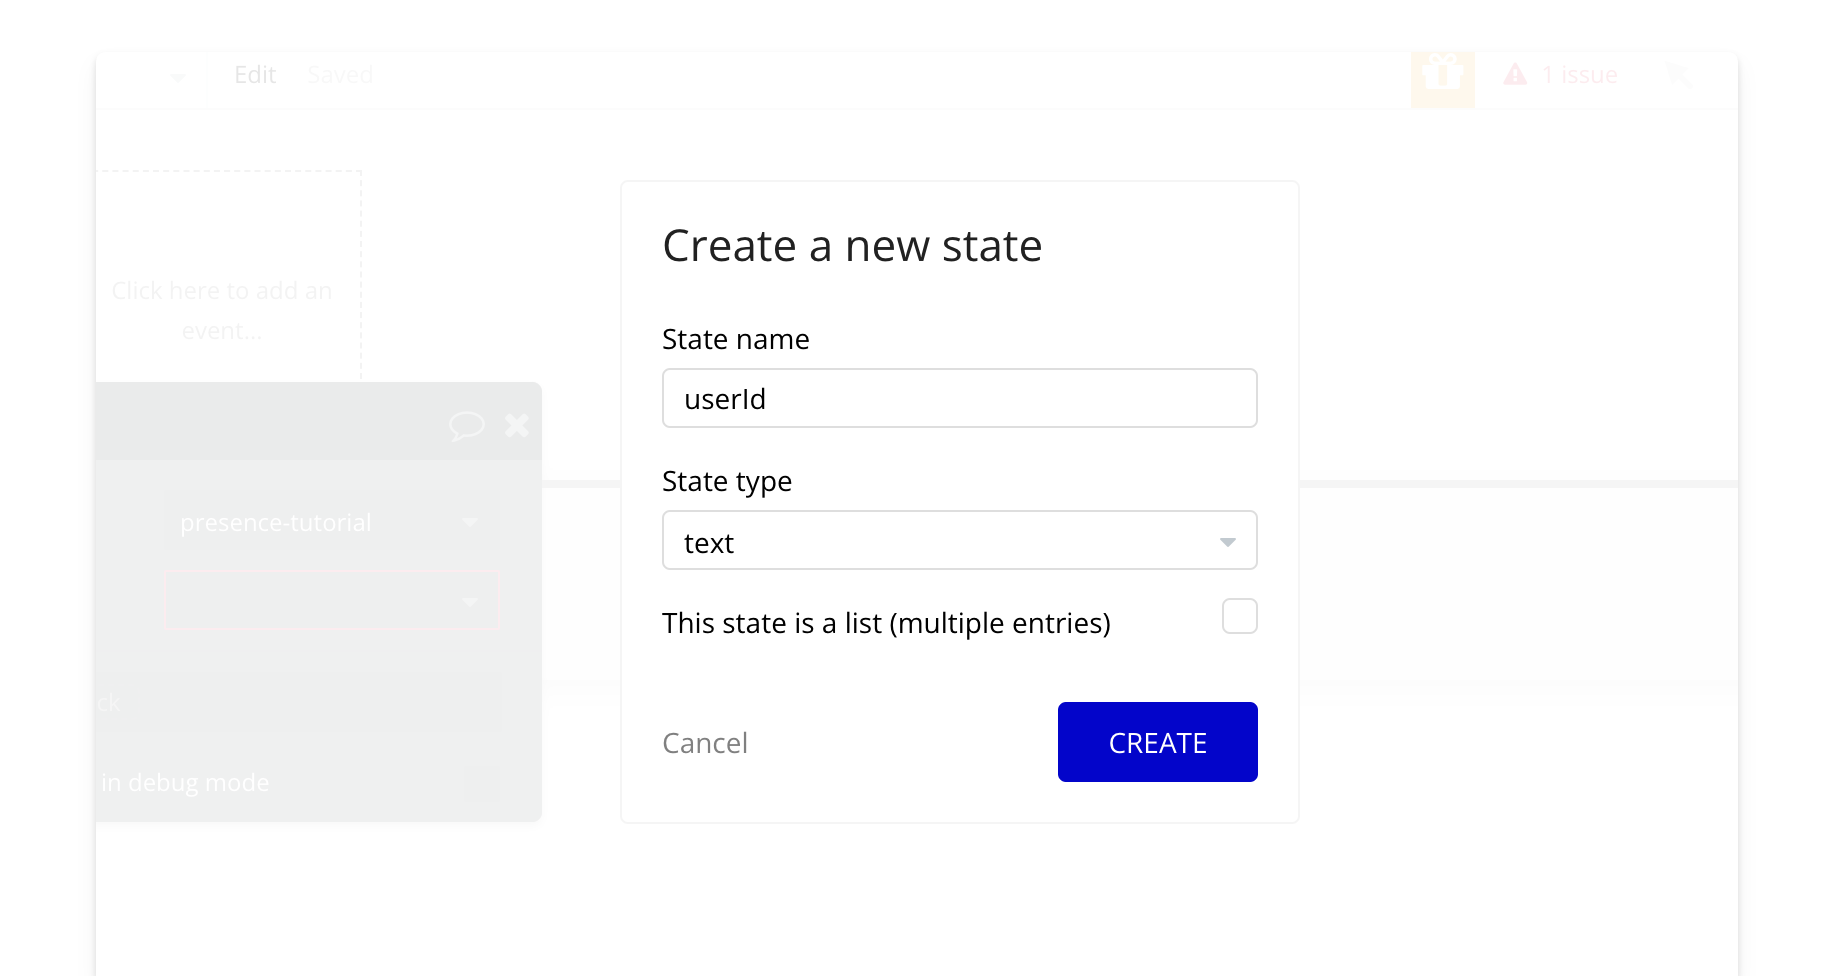
Set the element in the action's property editor to `presence-tutorial`, then create a new custom state:

Call the state `User ID` and make it of type `text`.
Add an action to set the state of the element to a random user ID.

Add the `authorize user` action—this authorizes users in Bubble with Liveblocks.
* For the `user ID` field, use the `User ID` state we just created.
* For the `Room ID`, use the `tutorial` room you created.
* Set `permissions` to `FULL_ACCESS`.

Add the `create client` action—this creates an instance of Liveblocks in Bubble. The `ID token` is the result of the user you just authorized. You can leave `throttle` and `lost connection time` as is. Learn more about the parameters of the `create client` action [here](/bubble/liveblocks/plugin-reference/elements/liveblocks-presence#create-client).

Add the `enter room` action. This is what joins the user in the room. Enter the `Room ID` and `User ID`, and keep the rest as default. Learn more about the advanced settings (e.g., live cursors) in [this tutorial](/bubble/liveblocks/how-tos/live-cursors).

## Demo
### 11. Trying it out
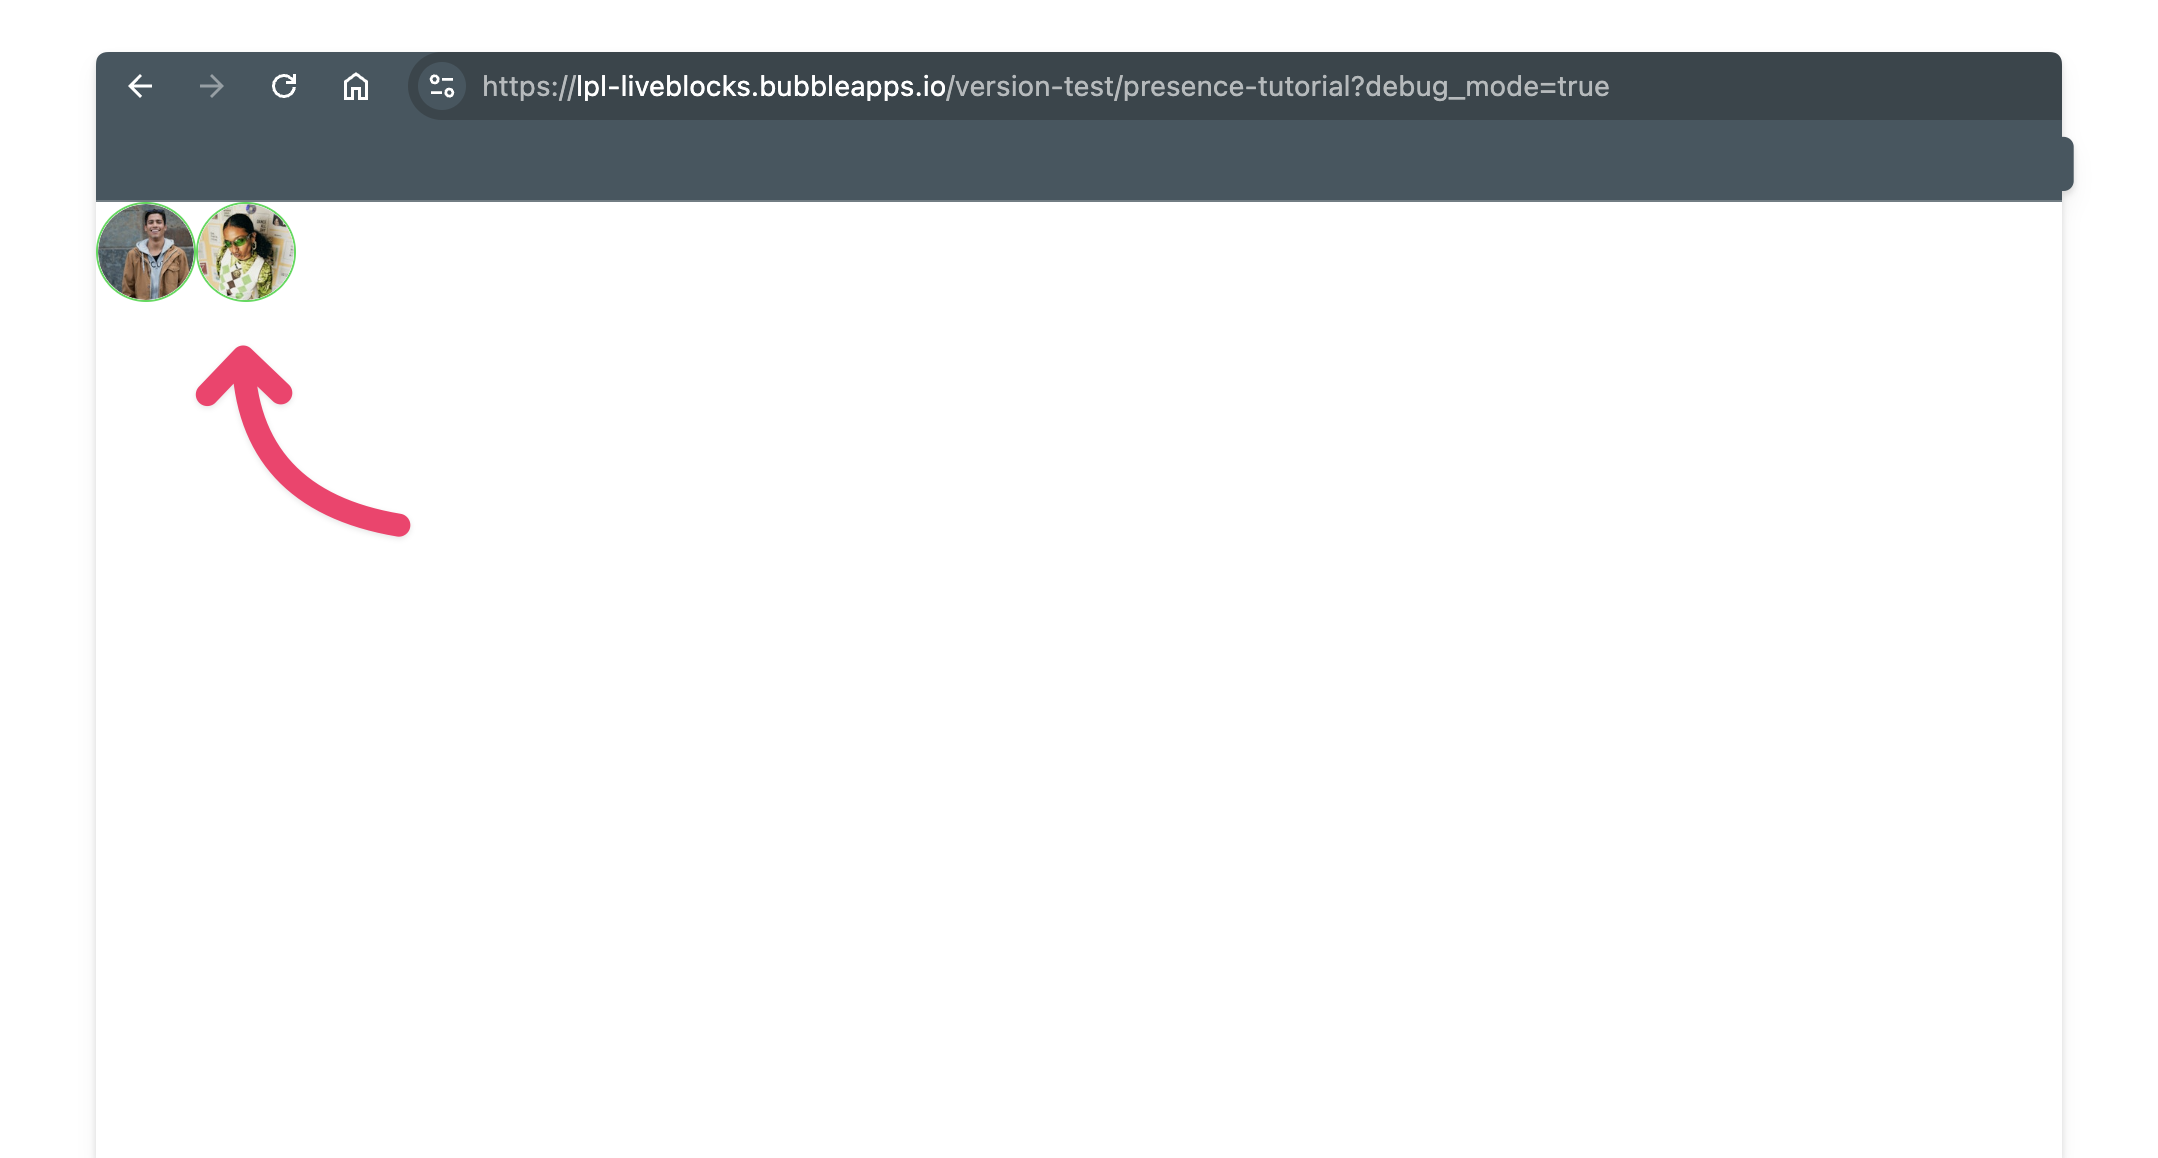
Select `preview` and you should see the page load with your avatar at the top. Open several tabs to see the users on the page update in real time!
***
## Next Steps
Now that you've got presence running, kick it up a notch with [live cursors](/bubble/liveblocks/how-tos/live-cursors).
View our options for free community and priority support.
Post your feature request on our
idea board.